Thứ Bảy, 4 tháng 8, 2018

Trending – Cooking with CBD oil

For those who are in tune with the times, the rising popularity of legal cannabis-derived products will come as no surprise.

Cannabis and some of its compounds – and in particular cannabinoids such as cannabidiol (commonly referred to as CBD) – are progressively coming out of the dark and finding their way into everyday products such as food, soft drinks and water, food supplements, pharmaceuticals, cosmetics, clothing or even pet treats.

For example, in early 2018, Holland & Barrett became the first high street chain in the UK to sell a hemp-derived CBD oil food supplement. The launch created a massive buzz in the media and products proved very popular among the general public, with sales skyrocketing and products going out of stock.

With an increasing number of CBD oils now available, there’s growing interest from consumers in this relatively new category of products and in the potential health benefits associated with the consumption of the molecule.

Indeed, number of studies around the world are investigating the effect of CBD consumption on the human endo-cannabinoid system (or ECS), which is thought to regulate certain aspects of our mood or immune system for example. Other studies are looking into the potential perks of consuming not only CBD on its’ own but in conjunction with all the other naturally occurring compounds in the plant (also know as the “entourage effect”).

However, whilst some people are happy to follow the manufacturers’’ recommendations and take the supplements as drops placed under the tongue, the taste can be slightly off-putting to others.

In particular, the raw full spectrum variety of CBD oil (which some would argue is the purest or most authentic form of cannabis oil) includes most if not all of the compounds naturally present in the cannabis plant. The most well-known of these compounds are the phyto-cannabinoids such as CBD or CBG, flavonoids, omega 3 & 6 fatty acids, vitamins, minerals or terpenes. Terpenes are the molecules that give cannabis its distinct taste and smell.

As a result, the flavour of certain full spectrum CBD oils such as Cibidoil’s Laboratory Grade Full Spectrum CBD Oil can initially come across as strong or unusual. Whilst some consumers eventually develop a liking for it (an acquired taste as one could put it), others never quite get used to it!

One solution put forward by certain clever enthusiasts keen to continue taking CBD supplements but are not sold on the taste, is to incorporate CBD oils into their food or beverages. In my opinion a great and easy way to include CBD and all the other goodness included in the cannabis plant.

Cooking with CBD oil

A quick google search delivers a plethora of mouth-watering recipes and an ever-growing list of ideas for how to cook with CBD oil. Here are some of my favourites.

  • 1CBD oil blended into an oat milk, kale and coconut smoothie.
  • 2Chia cinnamon and CBD parfait with hemp milk.
  • 3CBD oil mixed into basil, pine nut and parmesan pesto with fresh pasta and shrimp.
  • 4CBD oil added into a Caesar salad dressing and drizzled over a lemon chicken and superfood salad.
  • 5CBD oil infused peanut butter and jelly sandwich (my cheeky midnight treat!).
  • 6Char-grilled asparagus topped with CBD oil, coarse sea salt and garlic infused butter.
  • 7CBD oil infused brownies with Indonesian coconut and Madagascar vanilla ice cream.

The post Trending – Cooking with CBD oil appeared first on Cooky Mom.

How Much Juice is in One Lemon?

If you love cooking and tried a lot of recipes, then you will know that there are some which require you to juice some lemons. Fresh lemon adds zing and bites to sauces, dressings, and recipes, however, getting the ratio is quite tricky. 

So, how much juice can you get out of one lemon, anyway? 

Recipes might be inconsistent if you are trying to add fresh lemon juice to the mixture so knowing this simple fact can help you decide on how much lemon you will need to buy or how much lemon juice in a bottle you will need as an alternative for one lemon.

Curious much?

Keep on reading!

The Citrus Answer

The general rule

1 standard-sized lemon = 3 tablespoons of juice

So, if your recipe needs a juice of one lemon, then you can substitute it with 3 tablespoons of bottled juice. Or if the recipe is asking for 6 tablespoons of lemon juice, you can go and buy 2 lemons in the market. 

Nutrition and Health Benefits of Lemon

Lemons taste acidic, however, they are actually alkaline-forming in the body. This makes them perfect in restoring normal pH levels of the body’s system. 

Also, lemon is packed with vitamin C and flavonoids which helps in making your immune system stronger to fight infections such as flu and colds.Also, lemon is packed with vitamin C and flavonoids which helps in making your immune system stronger to fight infections such as flu and colds.

The limonoids compounds in lemons also aid in fighting against cancer and vitamin P in lemon can help in treating high blood pressure.

Also, the natural antiseptic properties of lemon juice can help in making your skin look young and spotless as well s treating sunburns, insect bites and eczema. 

On top of that, the antibacterial properties of lemon show that it can kill bacteria which causes numerous life-threatening diseases like diphtheria, malaria, and cholera.

Selecting and Storing Lemons

When buying for lemons in the supermarket, make sure to choose the thin-skinned ones with a finely-grained texture peel. Also, look for a lemon that feels heavy for its size, no signs of over maturity and has a full yellow color. Old lemons look wrinkled, mushy and dull.

In general, lemons will remain fresh for around a week at room temperature. Store them in a cool place and away from sunlight. Also, you can put them in the fridge to make them last longer for about a month.

Extracting Lemon Juice to the Last Drop

Extracting lemon juice can be quite troublesome, however, there are few techniques to help you juice a lemon ‘till the last drop. 

But before anything else, make sure to wash the skin of the lemon before you cut it in half. If you have cold lemons, then let them sit at room temperature for a couple of minutes.

Option 1: Use A Citrus Juicer

There are 2 types of juicer: the reamer and a hand-held the press. If you are using a reamer, then slowly roll the lemon to the unit and spin the lemon in order to extract the juice. 

If you are using a hand held press, you need to cut the pointy ends of the lemon in order to get a good leverage. Load the lemon into the juicer. Over the bowl, squeeze the handles wit all your might. If there is no more juice dripping down, then unload the lemon pulp and load it again with another one.

Option 2: Using A Fork

With a bowl, hold half of the lemon and stab it with a fork. Your other should squeeze the lemon while the other continuous to stab the lemon. This method enables you to squeeze all juice from the membrane of the lemon.

Watch this video on how to use the fork in juicing lemon: https://youtu.be/Y9VN1dVosjw

Option 3: Use The Spoon

Cut the lemon in half crosswise. Stick the spoon at the center and make twisting motions with the spoon and forcefully squeeze the rest of the juice out.

Option 4: Use An Elbow Grease

First, roll the lemon. Then cut it in halves. Next, squeeze it cut-side up until the last drop.

Juicing It Up!

Lemons— they can be used on fish, stir-fries, vinaigrettes, stews, marinades, dressings, sauces and more! A tablespoon of juice is quite enough in order to take a dish to a whole new level!

So, the next time your recipe requires some lemons, just remember the standard rule:

The general rule

1 lemon = 3 tablespoons of lemon juice.

I hope you find this article helpful. If you have any question or confused about something, feel free to fire up the comment section! 

Until then, happy juicing!

  • Pin it on Pinterest

How Much Juice is in One Lemon?

The post How Much Juice is in One Lemon? appeared first on Cooky Mom.

Chủ Nhật, 15 tháng 7, 2018

Best Carbon Steel Wok Reviews 2018: Top 5+ Recommended

Maybe you’ve seen it on food shows.

Maybe you saw one at a traditional Asian restaurant?

Those large, bowl-shaped cooking pans used by professional chefs, where they toss and mix food ingredients under overwhelming, high flames.

And you wondered:

“How come the food does not fall out?” 

Then the chef pours some kind of a wine and the flame just rages, leaving you very amazed with mouth wide open.

That, my dear friend, is a wok— a traditional cookware in the Asian culture!

What Is A Wok?

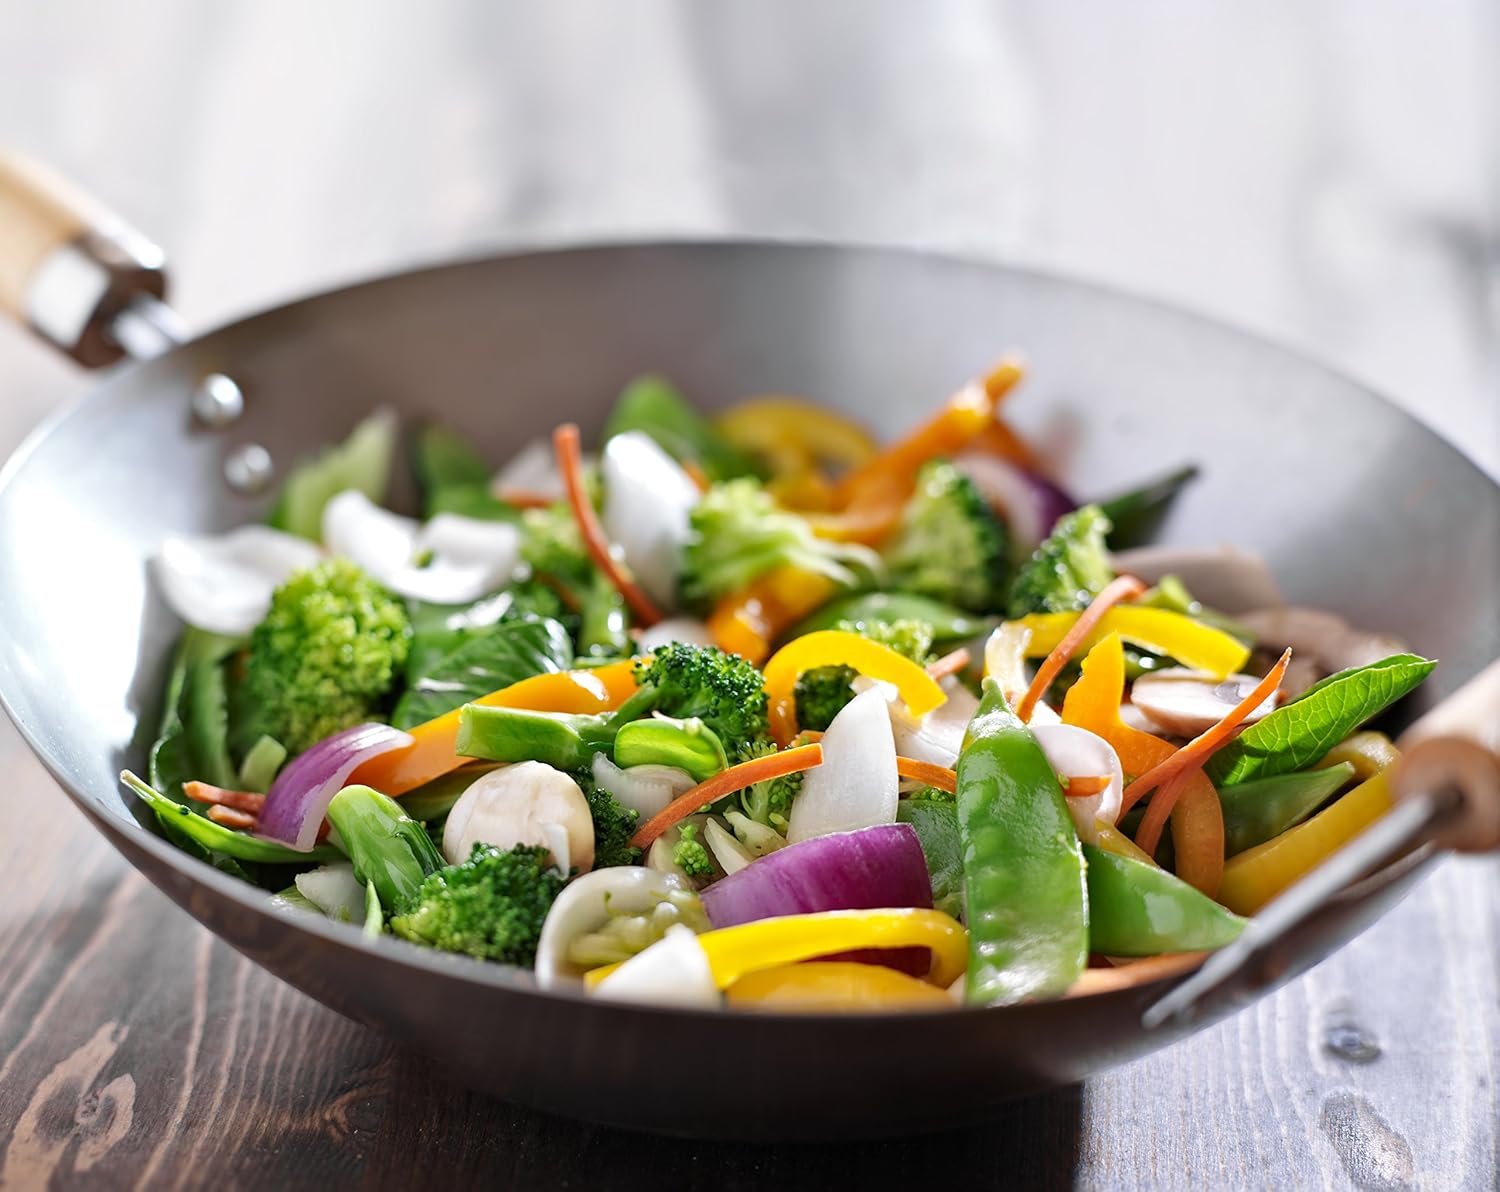
The wok is a wide, bowl-shaped cooking utensil which allows the chef to cook vegetables and meat with an even distribution of heat. Traditionally, woks were made of cast iron or carbon steel. Nowadays, you can find wok made of stainless steel and aluminum, with or without a nonstick coating. (These types, I don’t recommend.)

The flared, tall edges of a wok serve the purpose of keeping the ingredients from falling or jumping out of the side of the pan when attempting to toss the contents and ensures that you do not find half of your dinner on the floor. Moreover, these tall edges provide more cooking space for searing ingredients.

For instance:

If you are browning meats, you can arrange it on a single layer to the edges of the wok which gives you more surface area than in a standard sauté pan.

By tradition, woks were always rounded since they were meant to sit in coals of fire. Nowadays, the newer models are usually forged with a flat bottom in order to accommodate Westernized cooking surface. Flat bottoms ensure that the pan will not topple over even if you leave it unattended.

A Very Versatile Utensil: A Wok’s Different Cooking Techniques

There are just some kitchen items that do not need any introduction at all since everybody knows just how useful and versatile they are. The humble wok, particularly the carbon steel type, is a very interesting kitchen tool that will surely expand your horizons in terms of everyday cooking.

You can use a carbon steel wok for many cooking techniques like:

  • Stir-frying: Frying food in a small amount of oil on high heat and continuously stirring.
  • Braising: It is the most common use of a wok.
  • Pan Frying: Frying in a small amount of oil.
  • Deep Frying: Frying food in a lot of oil, typically in deeper woks.
  • Boiling: You can use it for cooking rice and soups.

Why Should I Get a Carbon Steel Wok Over Woks Made of Other Materials?

Ceramic cast iron, anodized aluminum, electric, stainless steel and other non-stick surfaces are materials available for woks. With a lot of options and materials to choose from for your new wok, you are probably wondering why I suggest that get a carbon steel wok over other options.

Here’s why:

1. It is safe

Almost all cooking methods and techniques need high temperatures. Some metals such as aluminum, release toxins when heated, thus posing a health threat to you and your family. Carbon steel, on the other hand, does not release any toxins even when it is heated on very high temperatures, thus it is safer to use in cooking.

2. Even Conduction

Carbon steel woks provide an even and rapid heat distribution, unlike stainless steel pans. It is the ability to transfer heat faster that can help you prepare food faster, resulting in more save energy.

3. Affordable

Carbon steel woks are much cheaper than their cast iron and stainless counterparts. This gives you the opportunity to prepare tasty and healthy meals without breaking the bank.

4. Lightweight

When compared to cast iron, carbon steel are quite similar— they are both made from carbon and iron, although in different proportions. Cast iron has 2-3% carbon while carbon steel has only 1% carbon.

This may look insignificant, however, it is world’s different. Both materials similarly behave when heated, however, carbon steel is more pliable and lighter than cast iron which becomes heavier and more brittle. This gives you the freedom to toss and flip your food and transfer the wok without so much strain.

5. Better Control

Carbon steel woks heat very fast and provide even heating. Not only that, it also allows even cooling. This should give you better control when cooking your favorite food that requires medium to low temperatures by regulating the temperatures when it goes pretty high.

6. Durable

Carbon steel woks are crack and chip resistant since it is made of a durable metal making it stand out from other wok materials.

However, without proper care, carbon steel wok might rust and affect its durability. Seasoning it can help provide a good mileage and allows healthy cooking.

Cleaning and Initial Seasoning: What You Need To Know

Carbon steel woks are very specific— you need to follow some rules if you wish to use it for generations to come.

First is cleaning.

You need to know that every wok needs to be thoroughly cleaned before you use it for the first time. This is to remove the factory protective coating prior to cooking. Just wash it with warm water and soap and scrub it thoroughly with a scrubbing pad. Rinse and wipe dry.

Also, most carbon steel woks are not dishwasher safe. Meaning, you need to make the effort to wash and scrub it with warm water and sponge every after use.

Initial Seasoning is an important step that you should never skip whenever you use your carbon steel wok to ensure that it will last for generations to come. Seasoning acts as a non-stick seasoning and should prevent sticking of food to the wok surface.

To do this, you need to rub cooking oil onto the interior of the wok before you go on with your cooking.

Features You Need to Consider when Choosing the Best Carbon Steel Wok

A wok is a great addition to your cooking utensils and will provide great service for your cooking needs. However, when it comes to shopping for one, people most often struggle with finding the right one.

Features You Need to Consider when Choosing the Best Carbon Steel Wok

Here are some features you need to look out for to help you buy only the best carbon steel wok on the market.

1. Round Bottom VS. Flat Bottom

Carbon steel wok comes in 2 different bottom shapes. You can use either a flat-bottomed or rounded bottom wok for gas stovetops. However, if you have an induction or electric range, it is best to go for a flat-bottom style since it will comfortably sit on top without wobbling.

2. Height and Size

The diameter and height of the wok should also be considered. And make sure to check its concave properties. If you buy a wok that is too deep, then the heat will only be retained at the bottom and heat transfer to the side will not be enough, thus an uneven cooking. If it is too shallow, then you might not be able to toss and mix the foods up to the sides.

Also, when looking for a good wok, you need to keep in mind the number of people that you might cook for. When considering the wok size, it is good to know that:

  • A 12” wok for preparing a meal for 5 people
  • A 14” wok for preparing a meal for 6 to 12 people
  • A 16” wok for preparing a meal for more than 12 people

3. Quality

The easiest way to tell a good quality wok is by looking at its materials and how it was made. There are various styles of carbon steel woks such as hand-forged woks which are of better quality and stamped wok which is cheaper, yet not as durable.

4. Handles

Woks come in various handles: some come with 2 small loop handles that are opposite to each other; some have a loo handle on one side and a long handle on the other side; while others simply have this one long handle. Know that all handles serve the very same purpose: to lift up the wok. Choose your wok based on your cooking techniques and preference.

5. Construction Method

Woks are made with different methods: stamping, spinning and hammering.

The stamping method involves the bending of a piece of metal. Woks made from this method have smooth sides. However, it is important to know that woks with smooth sides are clumsy at holding food, thus these are not the best out there.

The spinning method produces woks with granular sides. Woks made with this method have concentric circles down the pan which allows you to place food on the side without it sliding. This gives full control on cooking different kinds of food.

Hammered woks are those with small divots or indentations produced by each hammer blow. This is not noticeable if you don’t look closer enough. The edges of a hammered wok are rough and serve really well in holding your food in place.

Both hammered and spun woks are cheaper and affordable and would be a great choice for your cooking needs.

6. Utensils and Accessories

There are woks individually sold. There are some that come in a set which consists of a spatula, burner, rings steamer tray, ladle, lid and more. Determine what you will use your wok for before purchasing. Other than stir-frying, there are other cooking techniques like deep frying, smoking, and steaming and all these will need extra pieces of utensils for a successful cooking.

The Top 5 Best Carbon Steel Wok for your Kitchen

With a lot of brands and products available in the market today, looking for a quality carbon steel wok is like searching a needle in a haystack. Allow me to narrow down your searches with my top 5 most recommended carbon steel wok:

*Below, you'll find our more detailed reviews, but you can also click the links above to see current prices or read customer reviews on Amazon.
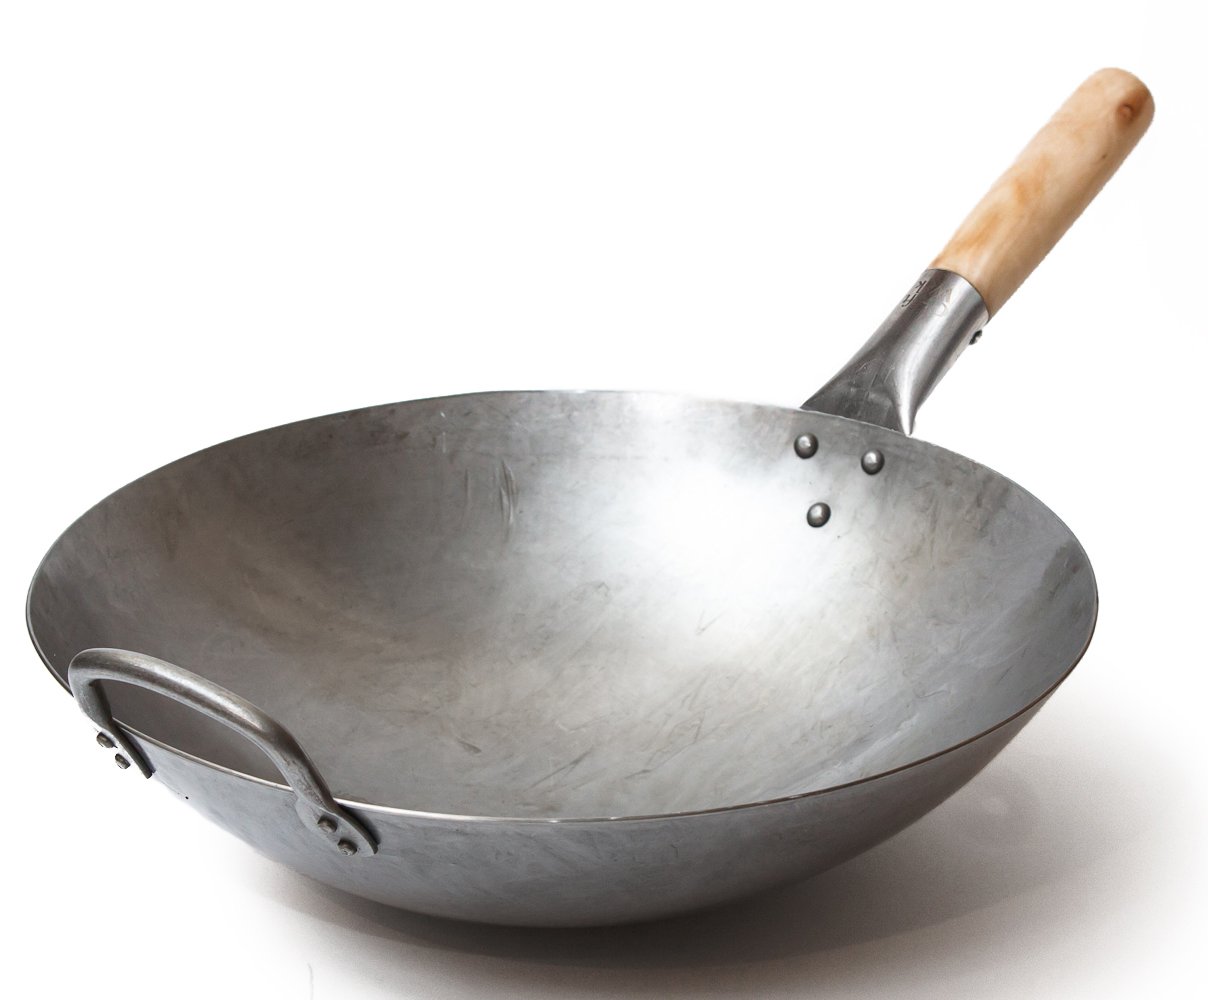
#1: Craft Wok Traditional Hand Hammered Carbon Steel Pow Wok

Craft Wok Traditional Hand Hammered Carbon Steel Pow Wok

Via Amazon.com

  • Quality
  • Price
  • Our rating

If you prefer a traditional hand hammered wok, then this wok design from Craft Wok is the best option for you. Even though it is a little costlier than budget woks, you will be reassured because of its exceptional quality. And I should say that this carbon steel wok is authentically made in Guangzhou, China, making it a wok that closely resembles the original designs and styles of Asian cooking woks.

This carbon steel wok features a wooden steel handle which makes cooking easy— tossing and flipping your stir-fries without the risk of burning your hand. Plus, it can withstand higher temperatures, for a worry-free cooking.

The Craft Wok has a thickness of around 1.8 mm and made from 15 gauge carbon steel for faster heating and keep the entire wok at an optimal temperature. Everything about this carbon steel wok has been carefully designed in order to make cooking at home easier and more enjoyable.

What We Like

  • Very sturdy and durable
  • Hand hammered
  • Authentically made in China
  • Very affordable
  • Ideal for cooking medium sized meals
  • Comes with a 15-inch gauge

What We Don't Like

  • Needs to be seasoned before use
  • It is not dishwasher safe

#2: Helen’s Asian Kitchen Flat Bottom Wok

Helen’s Asian Kitchen Flat Bottom Wok

Via Amazon.com

  • Quality
  • Price
  • Our rating

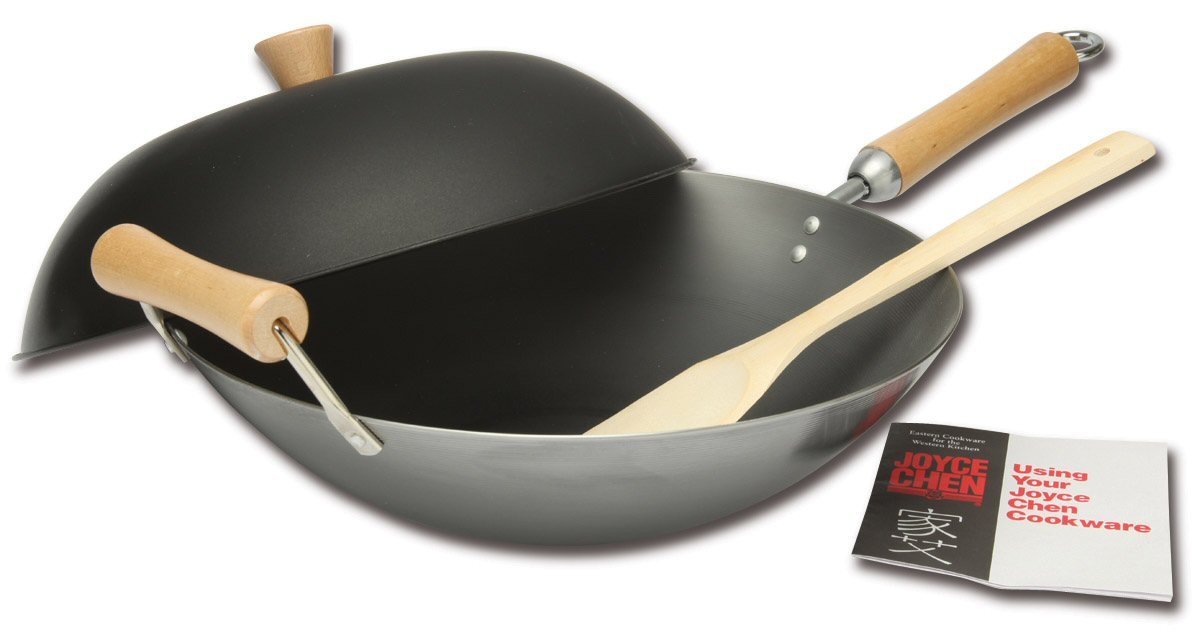
Made out of 1.6 mm carbon steel, this kitchen wok was designed by Helen Chen, a known name in Asian cooking. With a size of 14”, it is the carbon steel wok in creating a delicious Asian dinner for the whole family. It features a flat bottom design which is suitable for any gas, induction or electric stove.

The concentric grooves of the carbon steel are visible and provide a constant and rapid heating as well as cooling of the wok. It features 2 attractive and heat resistant wooden handles— one helper handle and one main “stick”. Plus, it has a loop on its handle for an easy hanging storage.

This carbon steel wok from Helen Chen also features a doomed metal lid which allows steaming and can even accommodate bamboo steam baskets. This carbon steel wok is also perfect if you think about giving it as a present for an aspiring Asian food chef. This is because it comes very nicely packed and quite generous with accessories— a recipe book, spatula and a lid.

What We Like

  • It is durable
  • Has 2 attractive wooden handles
  • Made for use on electric burner or gas stove
  • Quick conduction
  • Comfortable weight
  • Comes with accessories

What We Don't Like

  • It is not dishwasher safe
  • Carbon steel walls are bit thinner than others
  • A bit shallow than standard woks
  • Requires initial seasoning

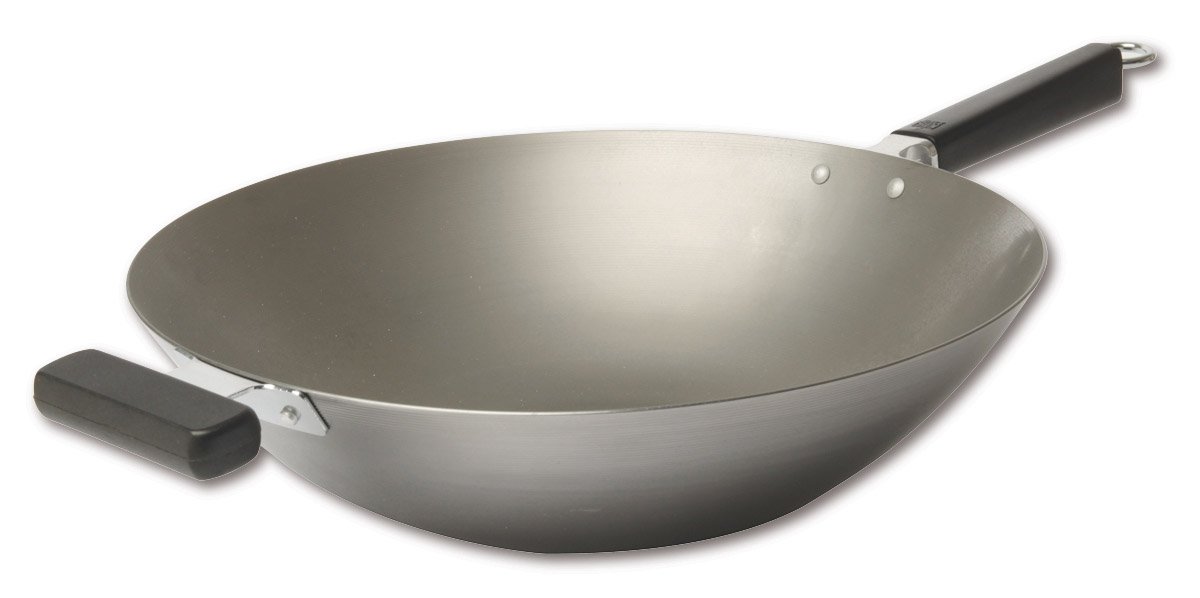
#3: Joyce Chen Pro Chef Uncoated Carbon Steel Wok

Joyce Chen Pro Chef Uncoated Carbon Steel Wok

Via Amazon.com

  • Quality
  • Price
  • Our rating

Joyce Chen first opened her restaurant back in the year 1958. Her high standards in Asian cookware make her decide to produce her own. Now, Joyce Chen produces best quality cookware from all over the Pacific Rim.

A standard family size wok, this carbon steel wok is one of her best sellers. It is 14” in diameter making it really light and easy to lift. This wok is 2mm thick which allows a rapid and even heating. It also features a flat bottom design which can be used in induction, electric, and gas stovetops.

With an ergonomic phenolic handle which fits really well in your hands and stays cool despite high heat when cooking, you can toss and flip your food with full control. Its additional handle helper provides stability to the pan and easy transporting from the stove to the countertop. Moreover, this carbon steel wok offers easy storage, thanks to the loop on its handle.

What We Like

  • Flat bottom design for stability
  • Easy to remove handles
  • Durable materials
  • Fast induction
  • Extra helper handle for easy transporting
  • Ergonomic phenolic handle

What We Don't Like

  • Too hard to scrub inner factory coating
  • A bit heavy when compared to standard 14” woks
  • It is not dishwasher safe

#4: Joyce Chen Classic Series Carbon Steel Wok

Joyce Chen Classic Series Carbon Steel Wok

Via Amazon.com

  • Quality
  • Price
  • Our rating

Well, because of the popularity of Joyce Chen products, it is no wonder that another product of hers make it to this list. From her Classic Series, comes this 14” carbon steel wok that is the perfect combination of size, function, and features.

It has a 1.5 mm gauge carbon steel body that makes it very durable and wear-resistant. It heats slower than other thinner woks, however, it heats very evenly, so it works really well with anything that you will be cooking.

It has Birchwood handles go a long way in keeping your hands safe from fire and cool while cooking. A side helper handle is also added for easy lifting and transporting of the wok. Moreover, its curved sides design extends the cooking surface, which helps with stirring and tossing.

What We Like

  • Long Birchwood handle
  • Side helper handle for easy lifting and transporting
  • Made for induction, electric and gas burner
  • Even heating
  • It has enough room to cook a whole fish

What We Don't Like

  • Slower heating
  • Initial seasoning required

#5: IEOKE Uncoated Carbon Steel Wok

IEOKE Uncoated Carbon Steel Wok

Via Amazon.com

  • Quality
  • Price
  • Our rating

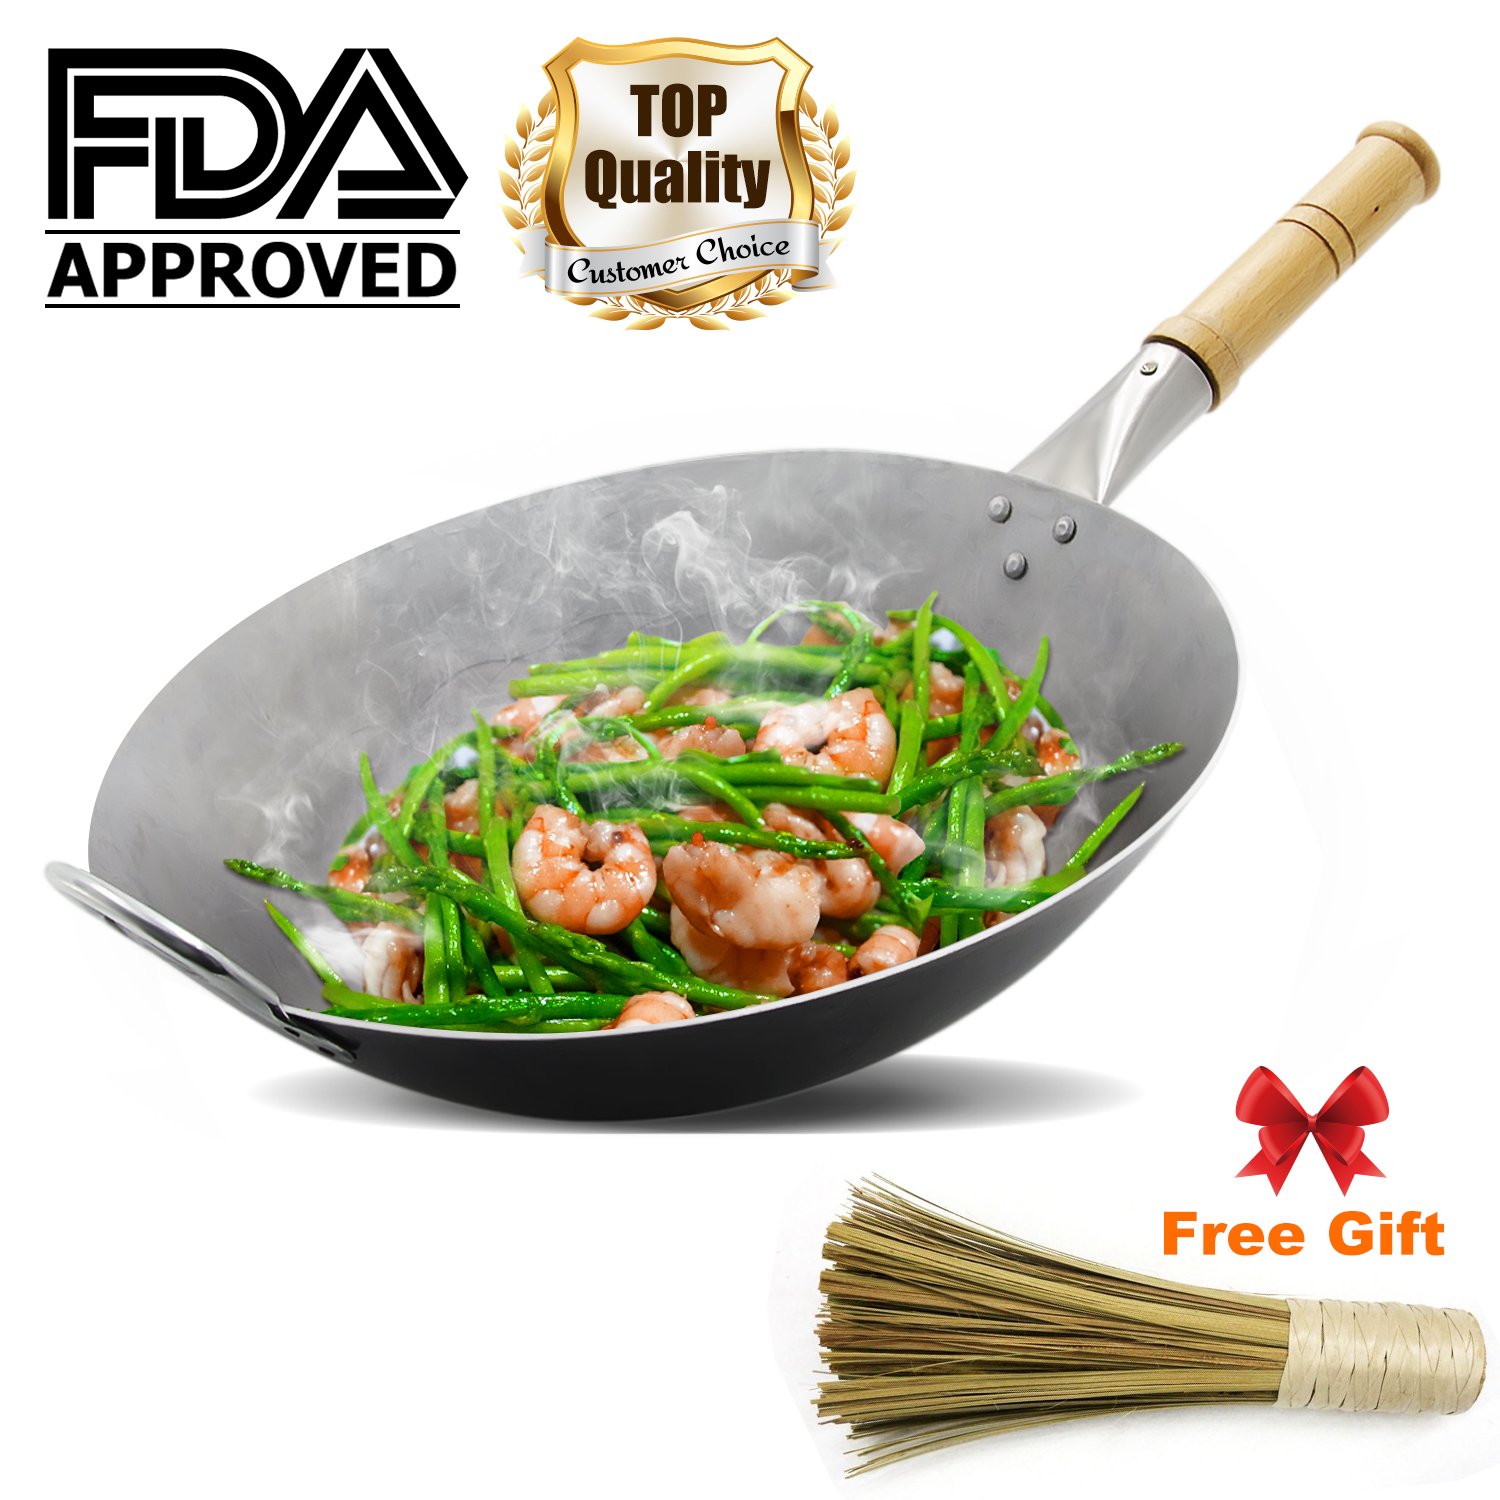
Here comes another top quality carbon steel wok pan with an FDA approval for safety. The IEOKE uncoated carbon steel wok is a Chinese hand hammered wok that is made from high-quality wrought iron. When compared with other woks, this carbon steel wok is firm and has a uniform density without any air bubbles or hollow from the surface.

Adopting a premium quality iron with few impurities and a smooth surface without coating, this carbon steel wok gives a physical non-stick surface for a problem-free and healthy cooking experience. Its thin wall and thick bottom structure provide evenly heating.

Moreover, it provides great thermal conductivity for transferring heat to the food directly in order to ensure cooked food in no time and save electricity or gas. It features a heat-resistant wood handle for safe cooking and a convenient handle for easy transferring and lifting.

What We Like

  • Hand-hammered wok
  • FDA-approved
  • Even heating
  • Non-stick surface
  • Heat resistant wood handle
  • Convenient handle helper for hang storing and lifting of the wok

What We Don't Like

  • It is not dishwasher safe

The Best Carbon Steel Wok of All

Among the 5 carbon steel wok I have listed, I highly recommend you the:

Helen’s Asian Kitchen Flat Bottom Wok!

It features unique, beautiful wooden handles and a high lid which can be used for steaming. Furthermore, it has the capacity to cook meal enough for the entire family as well as guest and friends who decide to stop by. Moreover, among the 5 woks, I have listed here, only this carbon steel wok is generous enough to give away other accessories which prove helpful in taking your cooking skills to the next level.

Tossing It Up!

The wok is a kitchen item that has been used for centuries and will undoubtedly be used well into the future. So, you need to take time in making a serious decision when investing in this one piece of cookware and make sure to get the best one to serve you for the many years to come.

I hope you find this buying guide helpful. If you have something on your mind, feel free to voice it out through the comment section below.

Until then, happy flippin’!

[tcb-script type="text/javascript"]amzn_assoc_placement = "adunit0";amzn_assoc_search_bar = "false";amzn_assoc_tracking_id = "cookymom-20";amzn_assoc_ad_mode = "search";amzn_assoc_ad_type = "smart";amzn_assoc_marketplace = "amazon";amzn_assoc_region = "US";amzn_assoc_title = "Shop Related Products";amzn_assoc_default_search_phrase = "Carbon Steel Wok";amzn_assoc_default_category = "All";amzn_assoc_linkid = "2b9b04213295fded1e1d69b9fdcbf56c";[/tcb-script][tcb-script src="//z-na.amazon-adsystem.com/widgets/onejs?MarketPlace=US"][/tcb-script]

The post Best Carbon Steel Wok Reviews 2018: Top 5+ Recommended appeared first on Cooky Mom.

Thứ Năm, 5 tháng 7, 2018

Best Kitchen Torch Reviews 2018: Top 5+ Recommended

Have you ever watched a cooking show? If so, then you might have seen a gun-like equipment that throws flame at desserts and other dishes.

Well, if you totally love creating awesome dishes like “baked Alaska” or lemon meringue pie, then you will need the best kitchen torch. From caramelizing fruit or finishing off a crème brulee to torching meringue or roasting peppers, a high-quality culinary torch is a must for any aspiring gourmet home chefs.

Introducing the Kitchen Torch

Best Kitchen Torch

A kitchen torch is a tool which uses butane, a flammable gas, in order to create an intensely hot flame. It is a lightweight kitchen gadget and does not require any electricity to operate— just a gas canister to throw a powerful flame. Ideal for caramelizing sugars and creating mouth-watering desserts and dishes, the best kitchen torch is very portable and has a myriad of other uses inside and outside the kitchen.

Why Do You Need a Kitchen Torch?

So, why exactly do you need a kitchen torch? In order to better understand its importance, I have listed here the following reasons as to why you should invest in a kitchen torch.

Best Kitchen Torch

1. Achieve A Perfect Crème Brulee

Perhaps the most common use of a kitchen torch is finishing savory crème brulees. And probably the most daunting part of creating a crème brulee is the caramelization of sugar. With a professional kitchen torch at your disposal, you can achieve the perfect crème brulee you see in a most high-class restaurant. With the help of the best kitchen torch, you can produce a perfect sugar burnt that you need for your crème brulee.

2. Complete A Perfect Sous Vide Meat

If you want to achieve a faultless sous vide meat, then you will need to have your own kitchen torch. If you are a admirer of the sous vide cooking method, then you can sear cooked meat with precision because of the full control you can gain with a culinary torch.

3. Offers A Wide Variety Of Uses

Kitchen torches are not only limited to making crème brulees and sous vide cooking. As a matter of fact, most people use a kitchen torch for toasting bread, melting cheese, and grilling toppings that they throw into their desserts or dishes. 

You can use a culinary torch in baking salmons, cupcakes, sous vide meat, glaze a baked ham, char grill vegetables, mash potatoes, crème brulee frosting and pretty much anything you need fire with. It also proves useful for outdoor tasks such as lighting the barbecue or igniting a fire at a campsite. 

Kitchen Torches: How to Use One?

You’ve probably seen professional chefs use a kitchen torch and it might seem very straightforward to use, but it is not. Yes, using kitchen torches is as easy as clicking a button, however, there is a technique you need to know first in order to make a perfectly torched food.

The key in getting the most out of your kitchen torch is to make sure that the flame has a blue tip ensuring that it is an oxidizing flame— which signals that your flame is not too high and that the temperature is just right. 

Most first-time user usually gets really excited in using kitchen torch that they set the flame too high with a yellow-orange tip. This only means that some hydrocarbons were not properly combusted and might end up on your food. 

Also, turning the torch on directly above the food is a mistake. Some of the fuel might be transferred accident, leaving you with a food that is slightly off in taste. Moreover, it is better to adjust the flame away from the food first, so that it will not get too burnt.

What to Look For When Buying the Best Kitchen Torch?

A kitchen torch is a pretty simple tool. However, if you want to have the best out there, here are some things you need to look for when shopping.

#1. Easy On/Off

Look for a kitchen torch with an instant ignition button or trigger so that you do not need a separate flame or spark to light it. Some kitchen torches have a trigger that you need to continuously depress when lit, while there is some with button which keeps it lit until you turn it off. This is a useful feature since you can comfortably hold the torch and never mind about it losing flames.

#2. Attached To Fuel Tank Vs. Self-Contained

Kitchen torches that are typically made for use in the kitchen are oftentimes self-contained the refillable fuel chamber like that of a cigarette lighter. These torches are comfortable to hold, however, they may require frequent refilling. Some torches, on the other hand, which are specifically designed for broader use has a screw onto the top of the fuel canister that ranges from the size of a shaving cream container to a much larger one.

#3. Strength/Size Of Flame

This should depend on your intended use. There are torches with small, very concentrated flames. This can be safer; however, it makes other process such as searing a large cut of meat, very difficult. There are other torches with a useful feature of allowing you to adjust the strength of the flame you want to use.

#4. Fuel Type

The most common type of fuel used in culinary torches is propane and butane— which are both fine to use. Propane burns a bit hotter, but butane tends to be a lot cheaper. There are also some torches which use MAPP/MAP gas which burns even hotter than propane.

#5. Gas Flow Adjustment

Look for a kitchen torch which allows you to adjust the size of the flame which suits that food you are making. Find a torch with a gas flow adjustment lever which gives you control of the flame it produces. 

Remember that a kitchen torch should produce a flame that is narrow, short and dark blue. If the flame is too big, then it is not safe.

#6. The Neck

A kitchen torch should have a long anti-flare neck— it is quite important that the flame it produces is precise and can work from any angle. If it is not, then you will need to go through unnecessary trouble just to do something that is supposedly simple.

#7. Ergonomically Designed

Choose a kitchen torch with ergonomic designs in order to boost efficiency and provides ease of use. Poorly designed kitchen torches can cause discomfort and redness on hands and might also cause accidents. Poor grip on torch might end up slipping off your finger and can be a huge problem if the torch is on. 

Look for kitchen torches that fit the palm of your hand and also have safeguards like non-slip handles or rigged handles. These not only provide safety but also give you a better control when torching your food.

#8. Durability

Whenever we buy any product, durability is the one thing we never forget to consider. Items that are not durable enough and break or stopped working after just a couple of uses can cause disappointments and can be very annoying and frustrating. Not only it would be a waste of money, it could also become a safety hazard.

#9. Child Safety

If you have little kids, then you should look for a kitchen torch that meets the Child Safety Requirements and have a safety lock feature. We all know how playful kids can be and nothing will ever pass their curiosity. So, remember to look for a child-safe feature in order to avoid any accidents.

#10. Effectiveness

The best kitchen torch should be effective and fast. This means that it can reach the minimum temperature of 2500° Fahrenheit. If it is lower than that, then the flame will not even be hot enough to make the top of a crème brulee crispy as it should be.

The Top 5 Hottest Kitchen Torch For Your Culinary Needs

*Below, you'll find our more detailed reviews, but you can also click the links above to see current prices or read customer reviews on Amazon.

#1: GiBot Blow Torch Lighter

GiBot Blow Torch Lighter

Via amazon.com

  • Quality
  • Price
  • Our rating

What we absolutely about the Gibot Blow Torch Lighter, is the location of the flame controls on its body. Looking at the device, .you will immediately see that the manufacturers put a major focus on user-friendliness. Rather than using a separate trigger, you can just turn the flame on or off by simply using one knob that also combines a button into it.

Just press the button in order to ignite the flame and turn the knob counterclockwise to turn it off. The knob for controlling the levels of the flame has been conveniently positioned close to your hands for you to easily change it while it is at work.

Another useful feature which is unique to this kitchen torch is its continuous flame. This feature allows you to keep the flames burning continuously for at least five minutes. This is a handy feature since you do not need to keep on pressing the button in order to keep the flame ignited.

Its base has been specifically designed to prevent tipping of the torch itself and the body. It is made from Aluminum alloy for durability. Moreover, the GiBot Blow Torch Lighter can be easily refilled with an 8 to 10 g of butane gas capacity.

What We Like

  • The base is designed to prevent any tipping
  • Useful continuous flame feature
  • Compact design with buttons and knobs conveniently located near your hands making it extremely user-friendly

What We Don't Like

  • No fuel gauge window to indicate how much gas is left inside
  • It only has a capacity of 8 to 10 g of butane gas which is low compared to others

#2: LiBa Culinary Torch

LiBa Culinary Torch

Via Amazon.com

  • Quality
  • Price
  • Our rating

The LiBA Culinary Torch is a simple, silver kitchen torch that measures 4.5 x 6 x 2 inches. Made from stainless steel for durability, this kitchen torch is built to last a lifetime. It also has a window which indicates how much gas is left inside, which helps you to never run out of fuel accidentally. This kitchen torch is very simple to use: First, you will need to fill the tank with butane gas then turn on the safety lock and use. 

It features a gas knob which allows you to control the flame strength and comes with an anti-flare technology. The LiBa culinary torch can burn up to 60 minutes and its nozzle is angled and extended which not only provides precision and more maneuver over the flame but also provides protection of your hands by keeping it away from the hot flames as much as possible. 

This kitchen torch has a capacity of 16 ml and can be easily refilled. Its base helps it to stand stably on countertop or table top when not in use. Lastly, LiBa offers a 90 days money back guarantee which replaces the product with no questions asked and comes with a 3 years warranty for risk-free buying.

What We Like

  • Works from any angle
  • Has a fuel gauge window
  • Can burn up to 60 minutes
  • Made of stainless steel
  • Simple to use
  • Safety lock
  • Anti-flare technology
  • Flame can be adjusted with the flame-knob
  • 90-day money back guarantee
  • 3 years warranty

What We Don't Like

  • Heavy
  • Does not have a rubber grip on the handle
  • Some users might find that the handle is too wide

#3: Iwatani Culinary Torch

Iwatani Culinary Torch

Via Amazon.com

  • Quality
  • Price
  • Our rating

This kitchen torch from the Japanese manufacturer Iwantani is a much more portable alternative to other refillable kitchen torches. Simply put, this kitchen torch consists only of the nozzle or the head with flame controls which you can install onto a butane canister before you can use. 

This kitchen torch is a good option for you if you travel a lot and wishes to shed off some excess burden of having to carry a bulky culinary torch wherever you go. Butane canisters can be easily bought at stored which can be found anywhere. So, as long as you have this kitchen torch with you, then your searing or torching needs will be covered.

This sturdy torch features a safety plate which ensures that it is locked firmly onto the canister and helps prevent toppling over that might cause a big mess on your working area. Moreover, it features the Piezo ignition technology which easily switches the flame on whenever you press the trigger.

What’s more unique about this product is that it has separate knobs for same shape and flame intensity. Cooking techniques such as searing, caramelizing and charring involves a kitchen torch which needs different flame intensities, thus the more control you have over the flame, then the better it is in crafting a perfect, sophisticated dish.

What We Like

  • Speared knobs for controlling flame shape and intensity which gives you more flexibility on using the torch
  • Comes with safety plate for a secure hold 
  • Portable torch made only of nozzle and control parts for easier carrying

What We Don't Like

  • No safety lock
  • Requires a canister

#4: EurKitchen Culinary Torch

EurKitchen Culinary Torch

Via Amazon.com

  • Quality
  • Price
  • Our rating

In order to make a restaurant-quality meal then you will need quality kitchen gadget like the EurKitchen Culinary Torch. This premium quality kitchen torch is made or durable yet lightweight aluminum and an ABS black plastic design. Moreover, it has an ergonomic handle which feels comfortable in your hands as you work on your culinary artwork.

With the EurKitchen Culinary Torch, you have full control over the flames because of its highly reliable Piezo press button ignition which ensures a consistent spark every time. The flames can reach 2370° Fahrenheit for easy torching or searing and its gas flow regulator can easily adjust the flame for up to 6-inch continuous flame. 

EurKitchen also keeps your safety in mind and has added a safety feature during operation— the burn-free finger guard which protects your fingers from getting burned and a gas flow safety lock. You can easily refill this kitchen torch and can use any brand of butane. Lastly, EurKitchen offers its buyers a 3-year warranty on this kitchen torch for a risk-free buying.

What We Like

  • 3-year warranty
  • Easily adjustable continuous flame
  • Ergonomic ABS plastic and aluminum design
  • Gas flow regulatory safety lock
  • Protective hand guard
  • Reliable Piezo press button ignition
  • Portable, compact and lightweight
  • Sleek modern design

What We Don't Like

  • It can be difficult to adjust the flame

#5: Searzall Torch Attachment

Searzall Torch Attachment

Via Amazon.com

  • Quality
  • Price
  • Our rating

Searzall is a torch attachment that is secured to the top of a kitchen torch in order to create a perfect searing temperature without the off-putting smell that usually results when cooking with culinary torches. 

By forcing the thin flame of a kitchen torch through 2 layers of high temperature-resistant and fine wire mesh, this kitchen torch attachment can produce an evenly spread and consistent flame which provides a professional quality finish to dishes and desserts. Its back screen is coated in palladium that provides an even temperature and oxidation resistance.

This handheld cooking device can turn a kitchen torch into a handheld broiler which makes delicious meal preparations in only a short amount of time. Searzall torch attachment is compatible with the 16.4-ounce propane tank and Bernzomatic TS8000 torch head.

What We Like

  • The perfect solution for torching food
  • Produce even sears for a high-quality finish on dishes and desserts
  • Intense heat for easy searing and torching in no time
  • No off-putting smell or taste on foods

What We Don't Like

  • Compatible only with bernzomatic TS8000
  • Only a torch attachment and not a kitchen torch itself

The King of Kitchen Torches

And now, the best kitchen torch award goes to: LiBa Culinary Torch!

Why? 

Its stainless steel build makes it very durable. Not only is it very simple to use with a couple of safety features for an accident-free cooking. Also, it has a window which gives you an idea on how much fuel is left inside so you never ran out of gas in the middle of torching. Lastly, its 90 days money back guarantee and 3 years warranty is a big plus if you are not entirely sure about the product and all. 

Light it Up!

A kitchen torch is but simple kitchen gadget that ignites your cooking skills and helps you create professional culinary artwork which can mesmerize your family and friends. There are numerous kitchen torches available in the market today, however, the ones I’ve listed here are among the best there is.

I hope this guide gives you plenty of information in order to make the right decision for your own torching needs. If you have any question or suggestion, feel free to hit the comment section!

Happy torching!

[tcb-script type="text/javascript"]amzn_assoc_placement = "adunit0";amzn_assoc_search_bar = "false";amzn_assoc_tracking_id = "cookymom-20";amzn_assoc_ad_mode = "search";amzn_assoc_ad_type = "smart";amzn_assoc_marketplace = "amazon";amzn_assoc_region = "US";amzn_assoc_title = "Shop Related Products";amzn_assoc_default_search_phrase = "Kitchen Torch";amzn_assoc_default_category = "All";amzn_assoc_linkid = "495af5f26958208adfd5171603369c4e";[/tcb-script][tcb-script src="//z-na.amazon-adsystem.com/widgets/onejs?MarketPlace=US"][/tcb-script]

The post Best Kitchen Torch Reviews 2018: Top 5+ Recommended appeared first on Cooky Mom.

Thứ Tư, 13 tháng 6, 2018

5 Easy Methods on How to Soften Cream Cheese for Any Cooking Needs

There are many recipes, particularly in baking that calls for a softened cream cheese. Whether you use it for baking cookies and as cake toppings or sauces, cream cheese can go with almost everything and gives a special taste.

However, it is important that you know how to work with cream cheese. Because some recipes need you to soften cream cheese before mixing it with other ingredients, mastering how to soften cream cheese is a must. Surely, you do not want to mix refrigerated cream cheese with other ingredients and feel the struggle in your arms just to have a smooth texture, right? 

Right!

So here I am, presenting you 5 easy methods on how you can easily soften cream cheese for any recipes you might have.

How to Soften Cream Cheese

5 Easy Methods on How to Soften Cream Cheese for Any Cooking Needs

Method #1: The Microwave Option

Relying on the heat of the microwave is the easiest and fastest way to soften cheese cream.

In this method you will need

  • Microwave-safe plate
  • Microwave (obviously)
  • Knife (optional)
  • Spoon or fork

Directions

  • 1Prepare your cream cheese. You can either soften a whole block or you can cut it into small pieces using the knife. Preferable, I cut the cheese into pieces since it speeds up the whole heating process. You can make at least 6 to 8 cube pieces of cheese.
  • 2Place the cream cheese on the microwave-safe plate.
  • 3Put the plate on the microwave and set it to “High”. Heat the cream cheese for 10 seconds. 
  • 4After the time elapsed, check for the softness and consistency of the cheese by pressing on it using a spoon or a fork. If the cheese easily gives way without any resistance, then it is ready for mixing with other ingredients. If it remains firm, then, out it back to the microwave and heats it for another 10 seconds. If it still remains firm, then you can heat it for another 5 seconds. 

Note

Be careful, however, not to overheat the cream cheese since it might burn and its consistency and taste will be ruined.

Method #2: The Blending Option

Here is another method on how to soften cream cheese in an instant. 

In this method you will need

  • Knife
  • Mixer or blender
  • Spoon

Directions

  • 1Cut the cream cheese into cube size.
  • 2Put in in a tilt-head mixer or blender. In case you are using a blender, you can add a little water to it so that you will have a creamy, smooth look.
  • 3Use the spoon to scrape remaining cream cheese from hard to reach parts of the blender.

Note

Try not to use a hand mixer. It will be a real struggle softening hard cream cheese with it.

Method #3: The Hot Water Bath Option

If you are not in a hurry, then this method should work well. This method is recommended for getting optimal softness for use in different recipes if you do not want your cream cheese nearly liquefied. 

How to Soften Cream Cheese - The Hot Water Bath Option

In this method you will need

  • A large bowl filled with lukewarm water
  • Ziploc bag or plastic wrap

Directions

  • 1Pack the cold cheese. In case, you still have an unopened cream cheese then you can proceed in heating the cheese. However, if it is already open, then you need to transfer it to a Ziploc bag or securely wrap it with a plastic wrap. 
  • 2Submerge the packed cream cheese on the large bowl filled with lukewarm water for 10 minutes.
  • 3After the time, take the cream cheese out of the water and gently squeeze it. If it is still firm, then put it back to the water and wait for another five minutes.
  • 4If it remains firm, then replace the water with a warmer one and put your cream cheese back until you get the desired softness and consistency.

Method #4: Softening at Room Temperature

The easiest, yet the slowest method of all. However, this is a great way to soften cream cheese if you will need for later. And since you do not expose your cheese to any heat, this method is great if you want to keep the texture intact.

For this method, all you need is a plate and your cream cheese.

Take the cream cheese out of the refrigerator and place it on the plate. Let it sit on the counter for 1 to 2 hours. The softening period may vary because of different room temperatures, however, 2 hours is enough in order to soften the cheese.

Note

Do not leave your cream cheese at room temperature for more than 3 hours. Unlike hard cheese, cheese cream will go bad if left for that long since it has moisture and tends to spoil much faster. It is important to set a reminder on your phone or have a timer, so you do not forget about your cream cheese on the counter.

Method #5: The Thinning Option

Adding ingredients to your cream cheese is a simple trick to get a softer cheese without heating it. Here are the best ingredients you can use for thinning your cream cheese.

1. Add cream or milk

Cream or milk is neutral-flavored products that are perfect for thinning cream cheese without altering its taste. Cream or milk make cream cheese less “tangy” but the difference is not a major thing. 

  • 1Add a small amount of cream or milk to the cream cheese. You can start by adding no more than one tablespoon.
  • 2Stir it well. Your cream cheese should become a little less solid and will be easier to mix.
  • 3If it is still not soft enough, you can extra amounts of cream or milk until you get the desired softness and consistency.

Note

Cream or milk softening is best if you want a cream cheese for the frosting.

2. Add melted butter

Adding melted butter is another good choice for thinning cream cheese. Melt the butter in the microwave and then combine it with the cream cheese. Stir well the mixture together until softness and consistency are achieved.

Note

Try to use unsalted butter to have the smallest possible effect on the taste of your cream cheese.

3. Add a small amount of lemon juice

Lemon juice do not only thin out the solid cream cheese, but it also gives it a noticeable tart taste. 

You might want to use less lemon juice than you would use for other ingredients in this section. You can try to add 1 to 2 teaspoons t your cream cheese and mix it well.

Note

While adding lemon juice goes well with frosting and other sour and sweet dessert, it will not go well with every dish, so try to use this thinning trick with caution.

4. Mixing with mascarpone

Very similar to cream cheese, mascarpone is an Italian spread that just a little softer and lighter. Since it is so close to cream cheese, mascarpone is a good choice if you want to make your cream cheese softer than it already is. The effect is noticeable yet subtle and is perfect when using the mix as a spread for desserts like bread pudding or French toast.

5. Mixing with marshmallow stuff

Fluffy marshmallow topping may not seem like it would not taste good with cream cheese, however, they can be perfect when thinning out cream cheese for frosting. This mixture gives cream cheese a mildly sweet flavor instead of the neutral flavors of melted butter, milk or cream and tartness from adding lemon juice.

Softening it up

Choosing the best way on how to soften cream cheese largely depends on how much time you have. Each method works just fine, does not requires much effort, and can be done by everyone with ease.

How to Soften Cream Cheese

Blending and using the microwave is your best bet for instant softening but can sometimes change the texture of cream cheese. 

If you have the time in the world, then leaving cream cheese at room temperature or in a bowl filled with lukewarm water should be good. 

Choosing the right way to soften cream cheese depends on how much time you have to spare. Each way works just fine, and it doesn't need much effort, and everyone can do it with ease.

If you want to break a sweat, then the thinning option would prove a good side-exercise for your arms. 

But, whatever method you choose, you will surely get the result you want. Just make sure that you do not leave a cream cheese out in the open for more than 3 hours or you’ll waste some decent cheese.

I hope you find this article helpful. If you have any questions or suggestions, feel free to sound your mind and fire up the comment section below.

Cheers to a softer and creamier cream cheese!

The post 5 Easy Methods on How to Soften Cream Cheese for Any Cooking Needs appeared first on Cooky Mom.