Thứ Hai, 28 tháng 1, 2019

Best Meat Slicer Reviews 2019: Top 5+ Recommended

Only meat blokes like me will ever understand that every day is a great day to eat meat!

Although meat cuts will do, I love getting my hands on deli-style cuts of meats. But, I’m also not into going to my local meat shop every day! Why pass by a deli when you can have it in your kitchen— fresh and expertly cut, right?

But knives?

Nahhh.

As much as I believe that food preparing and cooking is a form of art, there are just some things that are best left to machines.

Sure, a machine will never be able to cook a dish as I can, however, when it comes to preparations such as food slicing, I am all for turning the engine on!

Why would you spend your energy and time slicing a piece of meat manually— a process that is both tiresome and prone to injury— when you can just turn something on, a little push and voila— perfectly cut meat with style!

And that something is called a meat slicer!

No. Images Products Where to buy?

1

Chef’s Choice 6150000 Food Slicer

2

BESWOOD Premium Meat Slicer

3

KitchenWare Station Premium Electric Meat Slicer

4

F2C Electric Meat Slicer

5

WELOVE Manual Control Meat Slicer

Meat Slicer: What Is It and Is It For?

Originally, meat slicers are invented to perfectly cut any type of meat. However, most people also use the machine for slicing other types of food such as bread, cheese, vegetables and anything you need slicing.

And to answer the question:

What is the meat slicer for?

It is for making your life in the kitchen a lot easier!

Manual slicing is a tiring process and can provide inconsistent results. And in such a fast-paced world we are living in, a meat slicer can save you valuable time that you can later spend with your loved ones.

The Perks of a Having a Meat Slicer

1. Easy Cutting

As I have mentioned before, manual cutting is a tedious job and extremely tiresome. Also, cutting through frozen meats can be quite troublesome. Not for meat slicers, though! With this powerful machine, meat cutting is as easy as 1, 2, 3!

2. Uniform Cuts and Desired Thickness

Because you are using a machine, you can expect even, uniform cuts you see in meat shops. This makes the food look more presentable. Also, the best meat slicers come with adjustable knobs to produce your desired thickness of food slices. Now, you can create Japanese dishes that require thin slices of meat. 

3. Versatility

I already told you that meat slicers are not just for meats. This is why some people like to call it a food slicer, rather than meat slicers. It can cut through vegetables, fruits, cheese and more!

Buying a Meat Slicers? 8 Things to Consider

1. Construction

Meet slicers need to have a sturdy and strong housing which is made from high-quality materials such as aluminum alloy, die-cast aluminum, stainless steel, premium coated steel or a combination of these materials.

Other than being sturdy and durable, these materials are highly resistant to rust. Aluminum is typically lighter, while meat slicers constructed from premium coated steel or those with bigger aluminum alloy housing can be heavier and bulky.

2. Power

When buying a meat slicer, you want to make sure that it has enough power to cut whatever meat you have.

In general, there are two different types of slicers— belt driven or gear driven, or a combination of both.

Belt driven meat slicers usually lack the real power, so if you are planning to slice harder meats or bigger slices, then consider getting a gear-driven meat slicer.

But, if you are looking for a simpler in-home slicer, then a belt-driven meat slicer should do just fine. Plus, this type of meat slicers is usually quieter and perfect for thin and softer meats.

3. Blade Type

In terms of the blade, you get two choices— a smooth edge blade or a serrated blade.

Smooth blades work best on lean meats and vegetables, providing you with cleaner cuts. You need to avoid crusty bread and tough meats with a smooth blade, though.

For serrated blades, slicing bread and tough meats are easy. They can also cut through veggies, but, can leave a messy edge.

But, if you want the best of both worlds, then it would be best to get a secondary blade to switch in and out.

4. Controls

All meat slicers have an adjustable thickness that is usually controlled by a knob or dial on the machine. In general, the lower the number means a thinner cut, whereas a higher number means that you will have a thicker cut.

However, such numerical system can vary from brand to brand.

In order to help you slice frozen meats, the handle you use to slice meats is important too. Therefore, look for one with a large handle, a dual handle system or a fixed device handle which can make your slicing process a lot easier.

5. Safety Features

Remember:

Meat slicers are machines with extremely sharp rotating blade that you will be operating by hand. So, there is no question that you will look for safety features included. Here are some you should look for:

  • Knife GuardIn general, the blade of a meat slicer needs to be exposed as little as possible in order to prevent accidents. Look for a meat slicer that comes with a hand or knife guard that should act as a barrier between your hands and the blade.
  • Dual Safety SwitchThis feature prevents accidental startups. This feature, however, can be annoying and inconvenient depending on the slicer model you choose. So, if you are vigilant with where you are using the meat slicer and where you store it, this feature is not really necessary.
  • Rubber FeetMeat slicer should have rubberized feet in order to bring stability to the whole machine when cutting meat and avoid any accidents.
  • Safety Blade LocksBlade lock functions are highly common, particularly for meat slicers. A blade lock should prevent the slicer blade from moving unintentionally, which is great if you are storing the slicer within reach of kids.

6. Size

Meat slicers are fairly large appliances. Sadly, they do not break down for easier storage. So before buying, make sure that you choose one that can fit inside your kitchen cabinets.

7. Noise Levels

As you slice veggies or meat, will you be able to hold a conversation with the people next to you? Most meat slicers have a noise level range of 60 – 70 dbs.

8. Cleaning

Some meat slicers, particularly those for commercial use, have parts which can be removed and cleaned very easily. There are some other models that may not come with such parts which are so easy to detach. S, before making a purchase, take into consideration the cleaning requirements of these complex machines.

The Top 5 Best Meat Slicers 2019

*Below, you'll find our more detailed reviews, but you can also click the links above to see current prices or read customer reviews on Amazon.

#1: Chef’s Choice 6150000 Food Slicer

Chef’s Choice 6150000 Food Slicer

Via Amazon.com

  • Quality
  • Price
  • Our rating

Looking for high precision cutting at higher speed? Look no more than this slicer, accurately named. If you are a chef and this is not your primary choice, then are you really one?

The Chef’s Choice slicer is dedicated to producing restaurant-quality, paper-thin slices of meat, bread and more! It comes with the best food pusher design featuring a non-slip grip to minimize accidents.

And even though the unit is 120 watts, it produces super clean cuts fast and is really a quiet operator. The unit comes with removable parts, for easier cleaning.

What We Like

  • Removable parts for easy cleaning
  • Non-slip rubber feet
  • Creates consistent cuts
  • Good value for the money
  • Non-slip food pusher
  • Large food carrier

What We Don't Like

  • Suction cup feet can become stuck easily

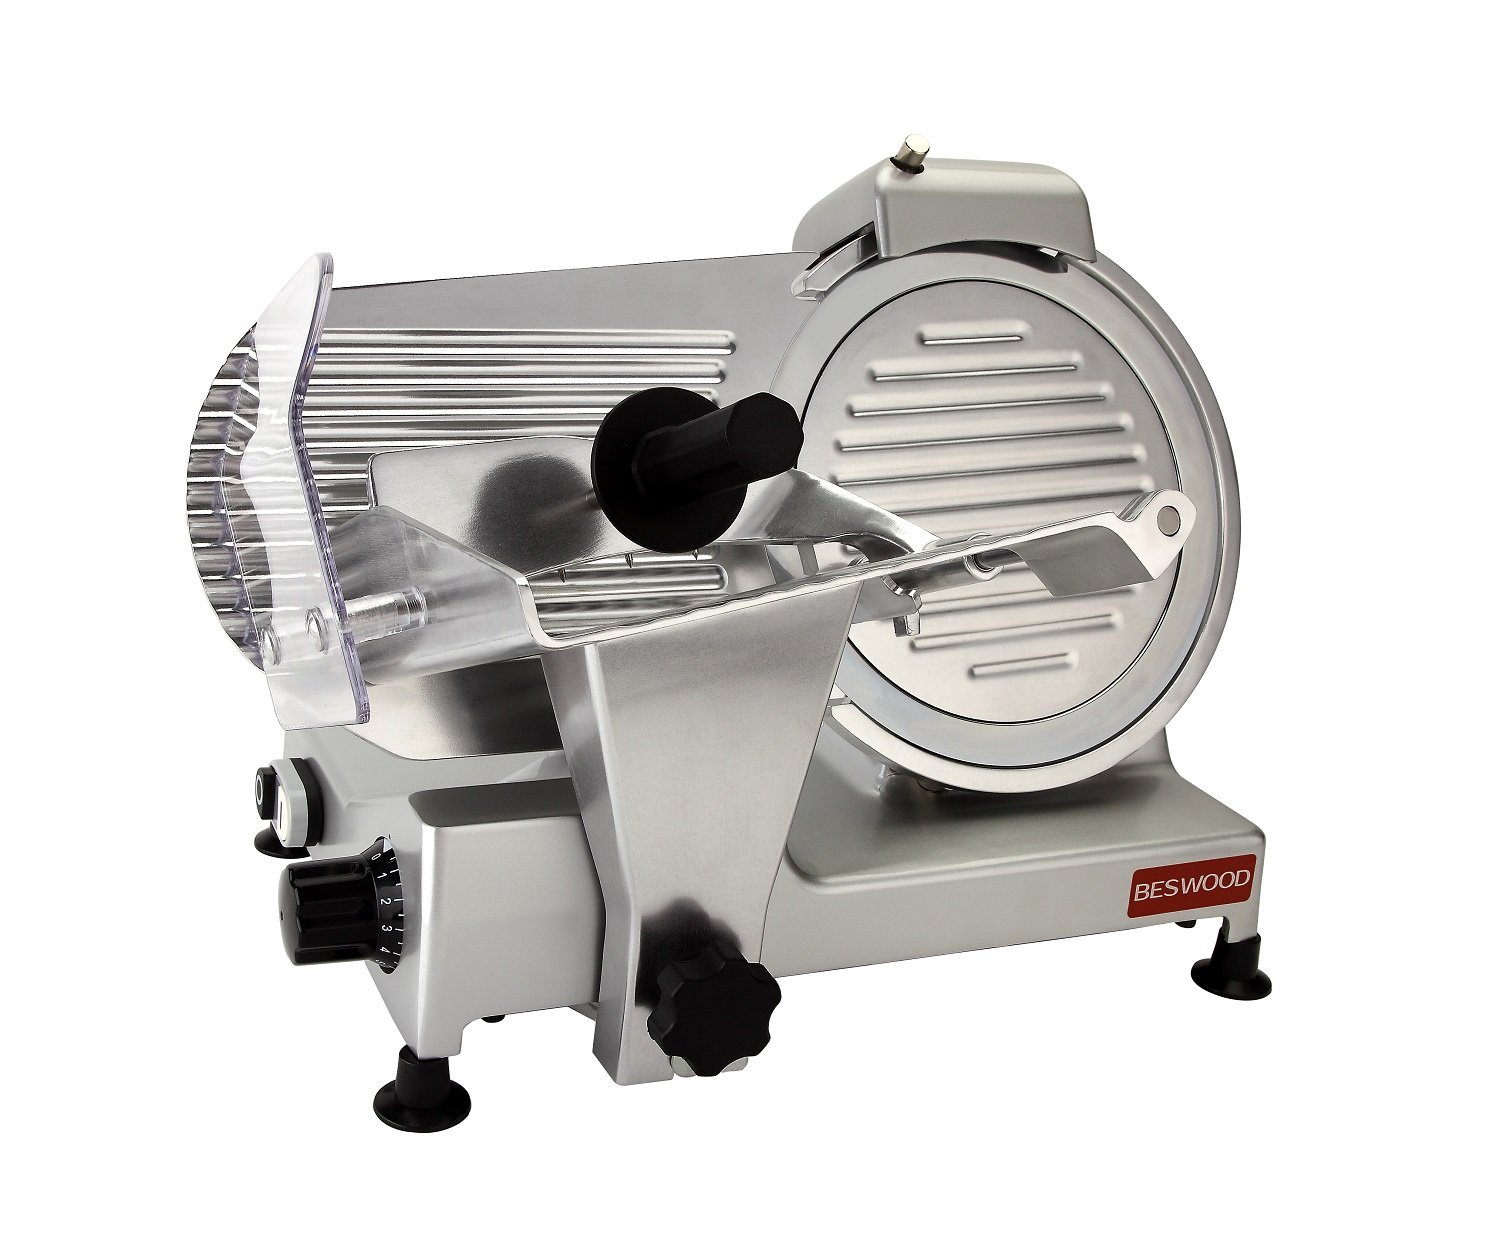
#2: BESWOOD Premium Meat Slicer

BESWOOD Premium Meat Slicer

Via Amazon.com

  • Quality
  • Price
  • Our rating

Carbon steel. Chromium-plated. This meat slicer from BESWOOD is designed for both commercial and home use. This thing comes with a massive 10-inch carbon steel blades which can cut through any type of meat, effortlessly!

It is multi-purpose, too. Veggies and cheese? This slicer has no problem cutting them down! Featuring industrial-grade aluminum body, this machine is built to last long for generations. What I love about this slicer is that it is fitted with 2 whetstones at the top in order to keep the blade sharp all the time!

The slicer uses high-quality V-belt which keep the vibration and noise to a minimum. In order to add an extra layer of protection against power shock, this slicer features a double-illuminated on / off switch. Featuring a blade ring guard, your hands should be safe when operating and the skid-proof rubber should keep the machine stead when slicing. Lastly, this meat slicer meets all U.S quality standards for safety such as ETL, NSF, and FDA.

What We Like

  • Commercial-grade equipment
  • Does not make too much vibration and noise
  • Produces thin slices
  • You do not need to sharpen the blades

What We Don't Like

  • Expensive
  • Not that easy to clean
  • Heavy

#3: KitchenWare Station Premium Electric Meat Slicer

KitchenWare Station Premium Electric Meat Slicer

Via Amazon.com

  • Quality
  • Price
  • Our rating

If you want a slicer that can cut through anything you want to cook, then you can’t just look past the KitchenWare Station Meat Slicer. It is perfect for anyone who takes the art of slicing seriously— whether at home or in their restaurants. This beast has more than enough power to slice through a selection of different types of foods while also keeping consistent results.

Built to last, the slicer housing is made of aluminum alloy which is highly durable and less likely to corrode. With a powerful but low noise motor and power transformer which can prevent short circuit and electric leakage, this slicer can slice meat at an extra fast rotary speed. Its 10-inch Teflon non-sticky stainless steel blade is extremely sharp an comes with a built-in sharpener that keeps the blade continuously hones and sharp for high precision slicing.

Featuring large numerical scale knobs, you can easily make thickness adjustments. For added security, the machine boasts skid-proof rubber feet that will keep the machine stable and secure. It also has a ring guard protection to prevent cutting yourself and the on/off switch and relays are separately built to prevent from being damaged. Easy to clean, the machine comes with removable parts for your convenience.

What We Like

  • Low maintenance
  • Skid-proof rubber feet
  • Ideal for commercial and home use
  • Smooth and low-noise operation
  • Durable aluminum alloy housing
  • Rust-resistant
  • Built-in whetstone
  • Easy to clean
  • Easy adjustments

What We Don't Like

  • Heavy
  • Smaller slice range
  • Smaller deck space

#4: F2C Electric Meat Slicer

F2C Electric Meat Slicer

Via Amazon.com

  • Quality
  • Price
  • Our rating

If you love to eat deli-style meat (like me) or you own a deli shop, then you will definitely love Amazon’s choice for “deli slicers for home”— the F2C Electric Meat Slicer! Solid and heavy duty construction, this slicer comes with die-cast aluminum and prime coated steel housing. Designed with spacious sliding food carriage, it is the perfect solution for home and professional chef looking for machines that can provide them nicely cut meats!

Featuring a 7.5-inch stainless steel cutting blade, this rugged, yet sophisticated looking slicer offers you a high yield slicing power. Boasting an impressive 150 watts of power, it can slice through just about anything and comes with a cool running motor and reliable smooth gear drive for a continuous slicing operation.

The built-in knob allows adjustments of thickness from 1/32” to ¾”. With a compact and sleek design, the small slicer can fit most home kitchen cabinets and countertops. Not only does it simplify your cooking needs, but it also simplifies the cleaning process, thanks to removable parts for easy cleaning.

What We Like

  • Compact and small
  • Removable parts for easy cleaning
  • Cool running motor for continuous slicing operation
  • Heavy duty construction
  • Easy slicing

What We Don't Like

  • Horrible instructions
  • Noisy

#5: WELOVE Manual Control Meat Slicer

WELOVE Manual Control Meat Slicer

Via Amazon.com

  • Quality
  • Price
  • Our rating

Now, this last item is very different than the rest. Why? Because this one is a manual meat slicer. Unlike other units on this list, this one requires your strength (not too much, though) to cut through meats and other food items.

This manual meat slicer from WELOVE resembles a paper cutter and is operated like one. Just place the machine on a table and load the meat to the meat shelf. Grab the meat block with your left hand and using your right hand, use the handle to slice the meat into thin pieces.

Made from premium stainless steel and a PVC handle, this meat slicer is durable, highly resistant to rust and completely waterproof. Thickness can also be adjusted from 0.2 mm to 25 mm. The unit comes with a replaceable high carbon steel blade, a sharpener, a spanner, 10 bags for rolling meat and a user manual.

What We Like

  • Premium stainless steel
  • Adjustable thickness
  • Comes with great accessories
  • Easy slicing

What We Don't Like

  • It does not work on fresh meat
  • Requires force
  • Tiring

Precautions When Using a Meat Slicer

Meat slicers have really sharp blades in them.

And it is not just about being careful when slicing meats. The, even more, trickier part is dealing with the blades while you clean the meat slicer. Using safety guards such as safety gloves while washing the blade is needed to avoid cuts on your hands.

Most meat slicers come with a user safety manual. You need to read it carefully before using the machine. Make sure that the power button is off until the meat is ready to be sliced. Also, checking for any loose or missing parts is crucial to prevent the chances of malfunctioning.

You also need to pay close attention to the surface on which the meat slicer is kept. The base of the slicer needs to be clear of any uneven surface as it may slip or turn upside down when operating.

Maintenance 101: Cleaning a Meat Slicer

Like all kitchen equipment, it is essential that you clean your meat slicer thoroughly— for hygiene and prolonging the life of the machine.

When you do not regularly clean your slicer, food residue can eventually build up in different parts of the machine which causes bacteria to grow. The bacteria buildup can contaminate foods and be the cause for foodborne illnesses, making you ill.

Additionally, a meat slicer can transfer small food particles or flavors onto foods you slice later, changing the texture and taste of your dishes.

Specific Problem Areas

The slicer handle, blade guard and ring guard monitor should be monitored carefully for any broken, cracks, unattached or missing parts. Food particles accumulate under the slicer handle, inside the blade guards and at the ring guards.

Also, make sure that you regularly examine seals and seams on your machine to see if they have worn away and created additional crevices where bacteria and leftovers can accumulate.

Tips Before Starting

  • Always follow the manufacturer’s instructions carefully.
  • Wear protective gloves. Choose cut-resistant gloves such as cut-proof metal gloves are the best option.
  • Never submerge the slicer completely.
  • Never use steel wool since it can scratch the meat slicer.

Cleaning A Meat Slicer

  • Set the thickness of your slicer to zero. Wipe both sides of the blade using a gentle scrub pad as the slicer is in motion. Once you remove any large particles, turn or and unplug the slicer.
  • Make sure that the gauge plate is in a closed position and the whetstone is out of the way. Remove the product tray, center plate, and the product tray and wash and rinse these components.
  • In order to clean the blade, you can leave it in place or remove it. If you leave the blade in place, clean it thoroughly. Alternatively, you can use degreasing spray in order to clan the blade. Clean both back and front of the blade while wiping from its center outward.
  • Wipe down the exterior and remaining pieces. After that, rinse with hot water using a towel.

Oiling a Meat Slicer

Lubricating a meat slicer is just as important as cleaning. You need to keep the blade of the slicer well-oiled so it keeps a consistent and fast rotation. Regular oiling keeps the blade and the machine from rusting.

The best oil for the job is a food grade machine oil. Stay away from vegetable and canola oil since these can turn the blade rusty and blunt.

Slicing Royalty

And now, to announce the best of the best. We crown…

BESWOOD Premium Meat Slicer as the king of meat slicers!

Designed for both home and commercial use, this is one durable machine that should last for a lifetime. Steel blades that come with its own sharpener, you can cut through anything and do not have to worry about dull blades. Other than that, this beast comes with all the safety features that you need!

Meaty Thoughts

Whether you are hosting a meaty party or want to serve a meat dish, deli-style, a meat slicer should guide you through the easy path of preparation.

Do you have any questions? Suggestions? Violent reactions? Feel free to voice up your concerns and hit the comment section below.

Until then, happy slicing!

The post Best Meat Slicer Reviews 2019: Top 5+ Recommended appeared first on Cooky Mom.

Thứ Tư, 23 tháng 1, 2019

Best Smoker Grill Reviews 2019: Top 5+ Recommended

I love backyard grilling!

Who has not woken up to a nice warm day, perfect for taking out the grills and have a fiery spur of outdoor cooking moments with the family?

I mean, there’s just something about the blazing charcoal, the sizzling meat, and that tummy-growling smoke!

You can throw a mean rack of sausages, chicken or ribs while you enjoy football on the weekends and get on with it or try something REAL— something entirely different than the common BBQ grilling.

Your BBQ never tasted THIS GOOD!

Curious?

It’s called smoking.

And smoking, my dear friend, is more of a labor of love and deliciousness. This slow process only means that whatever you are cooking not only takes in all the mouth-watering smoky flavors but also gives you succulent and tender meat that will make your stomach beg for more!

Desperately want that?

Well, you will need to start looking for the best smoker grill in town!

What is a Smoker Grill?

AKA pipe smokers, horizontal smokers or offset barrel smokers, a smoker grill allow you to have serious control over the entire smoking process.

This bad boy is the key to get a dreamy, tender, fall-off-the-bone meat with dark and crispy bark— yes, please!

A smoker grill is specifically designed to smoke meats in a long and horizontal chamber and placed alongside the heat source instead of being directly above it. This design makes replenishing of fuel and heat adjustments much easier since you do not need to move the food out of the way just to add woods or coals to the heat source. Attached to one side, the firebox feeds smoke into the cooking chamber. 

And that smoke, my dear readers, is what gives the meat such melting tenderness, rich flavor and crunchy bark on the outside!

The Different Kinds of Smoker Grill

The market offers 4 main types of smoker grills— each with its own pros and cons and offering of flavor.

1. Charcoal Smokers

There’s something about charcoals.

And if mouth-watering, tasty and fall-off-the-bone tender smoked meat is what you see, then charcoal is the best. With a charcoal smoker, you can produce such tender meats and explosive flavors and aroma that will seduce your neighbors, right away!

Charcoal smoker grills do not require electricity and gas (obviously) but will require mastery of fire making using charcoals or briquettes in order to produce smoke and heat for your food.

It takes practice to get better, but when mastered, the results will speak— or rather taste— for themselves.

There are 3 designs of charcoal smokers in the market today:

  • Offset smokers
  • Cabinet smokers
  • Drum or barrel charcoal smokers

For the aspiring grilling master, cabinet style smoker is a perfect choice since they are well-insulated and produces top quality grilled meat. Off-set smokers, on the other hand, can be hit and miss.

An absolute favorite of charcoal enthusiast is the drum or barrel smoker since they are easy to use, affordable and provide amazing smoky flavors!

PROS

  • Charcoal produces the best flavor of all smokers 
  • Easily maintain and reach high temperatures
  • Charcoal is cheap fuel
  • You can use charcoal in any weather and will produce the same results
  • Charcoal is available all year-round

CONS

  • Grilling with charcoal can take longer to learn and master
  • Messy cleanup
  • Some buildings and apartments ban the use of cooking with charcoals

2. Electric Smokers

For the busy and lazy grillers, electric smokers are the best to have since they are easy to set up and start smoking with. It is the perfect tool for those who just want to plug in something and create genuine smoked meaty flavor, minus the hassle.

The biggest perk of an electric smoker is, of course, the less worry of tending to the fire and never spending the whole day outdoors with it and instead spend time hanging with the family, watching movies or entertaining guests.

This type of smoker is best for beginners and do not require much maintenance. You do need to add wood chips to produce the smoke and its flavor. But, you do not have to worry about dangerous gas and messy charcoal.

PROS

  • Can be used indoor
  • Easy to control temperature
  • Set-and-forget style of grilling
  • Cheap t run
  • No need to use charcoal or dangerous gas and dealing with fire
  • Easy to use

CONS

  • Limited space since electric smokers are designed for smaller cooks
  • Not rain-friendly
  • Low cooking temperatures
  • Most complex style of smoker since it comes with lots of technical parts

3. Gas Smokers

Gas smokers use natural gas or propane in order to heat wood chips that are added to the smoker to produce the smoke. It is another type of smoker that is relatively easy to use and suitable for set-and-forget grilling style.

Gas smokers offer similar flavors you get from other type of smokers, but with a better flavor than electric ones because of fuel combustion.

Gas smokers also allow you to combine the level of effectiveness and affordability of producing great tasting BBQs.

PROS

  • Portable
  • Set-and-forget grilling style
  • Quick and easy cleanup
  • Produce consistent temperature
  • You never need to refuel when using a natural gas connection

CONS

  • Not versatile since gas smokers are designed to smoke only
  • Comes with more parts that can wear out or break
  • Running out of gas or switching propane bottles mid smoking

4. Pellet Smokers

A favorite, pellet smokers help produce flavorful and juicy meals with a variety of meats and veggies. Because of its design, most models feature dedicated grilling options for versatility.

Of all the types of smokers available, pellet smokers are recognized as the easiest to use. Some people even refer to this type of smoker as the “Cheater’s Smoker” since they are very easy to use, yet produce great flavors.

All you will need to do is to select the cooking temperature and smoker will maintain the selected temperature with its temperature controller.

Simple design, a pellet smoker requires you to feed wood pellets to the pellet hopper that goes through an auger, feeding a fire pot. The temperature controller will feed pellets as needed in order to maintain the temperature that you want.

The flavor that pellet smokers offer is tasty and smooth. Although some people claim that it does not produce smoky flavors as strong as charcoal smokers can. But, you can solve that by just changing the pellets you feed.

PROS

  • Set-and-forget grilling style
  • Easy to maintain and clean
  • Maintains consistent temperature easily
  • Easy to use
  • Highly versatile

CONS

  • Produce lighter smoke flavors
  • Unit needs to be plugged all the time so the automatic auger runs
  • Expensive
  • Pellets can be hard to find unless you buy online

Do You Really Need a Smoker Grill?

Smoker grills can be quite an investment, so I do understand the question. So, here X reason to convince you to buy a smoker grill.

1. Authentic Taste

Do you love BBQ?

If yes, then smoker grill will provide you a better BBQ!

Smoking preserves the genuine taste of the food your grill and you will not have any unnatural taste.

2. Versatile

Smoker grills are nothing more than a griller and smoker combined into one. BUT— it is a multifunctional piece of equipment that can serve the purpose of a griller, a smoker, a roaster and more, depending on the type and model you choose.

3. Budget-Friendly

Uh-huh?

I just said that they are relatively not cheap. So why budget-friendly?

Up front, smokers can be expensive that regular grillers. But, in the long term, you will realize that having bought this grill and smoker combo has saved you a lot more money than buying single-purpose grilling equipment to complete your grilling set.

4. Smoooooky Flavors

Do I need to explain it further?

Just think about the smoky flavor of your regular BBQ and imagine doubling— no— tripling that.

5. Preserve Nutrients

Because of the smoky crust and slow penetration of heat, the nutrients of your food will be preserved. High heat is known to destroy the essential flavors and nutrients of the food you cook.

6. Juicy and Soft Meat

Want meat that you can slice through with a spoon?

Well, the long cooking hours and slow heat will turn even the toughest meat into a fall-off-from-the-bone texture. A big plus, smokers help preserve the juices of the meat and cases of long and struggled chewing on dry foods will be a thing of the past!

7. The Party Plus

You might say that you are an introvert and this thing does not apply to your lifestyle. But, trust me when I say, one of this day you will be throwing a party. And outdoor parties without an option for grilling and smoking?

Well, you are rendering your party unentertaining there, bud. So avoid the disappointing looks from your guests and invest in one of these versatile beasts.

What Makes The Best Smoker Grill?

1. Construction

The materials that a smoker grill is constructed from should play a big role in the price, quality, and longevity of the product. Stainless steel smoker grills may look impressive, however, if you are going to store and use the unit outside, then it will rust rather easily.

Look for a smoker grill that has enameling or quality coat of paint so that it can last longer in such conditions.

2. Cooking Space

When looking for a smoker grill, the most important thing you need to decide is how much space you will need. These units are not one-size-fits-all. If you are regularly hosting a BBQ party then go for larger ones. But if you only grill for your family, then you can go with standard sizes.

3. Shelving

Getting a smoker with shelves under is quite handy. It offers you the convenience to store firelighters, tongs, spare charcoals, grill brush, covers and other tools you need when cooking.

4. Secondary Racks

Having a secondary cooking rack can offer you an extra cooking space and on some units, you get at least 40 percent more cooking space.

This feature is extremely important with pellet and charcoal smokers, but, with gas and electric smokers, this will depend on what you are cooking.

5. Maneuverability

Are you going to grill in one spot of your backyard? Or maybe you have a wide backyard where you can move your smoker around depending on the weather or where you wish to cook? Do usually go fishing and camping and would like to take your grilling with you?

You can get various models of smoker grill which come on stands, poles, wheels and even some which have adapters in order to fit the back of your car.

6. Cleaning

Like any kitchen tools, it is important that you keep your grill tidy and clean. This should produce better food and extend the life of the unit. Cleaning a smoker grill can be difficult if you do not keep on top of it. But, you can find smoker grills wit easy cleaning features in order to make things easier for you.

7. Useful Features

Due to innovation and advancement of technology today, you will find smoker grill models that do more than just cooking grate over a wood fire. Now, smoker grills come in features like multiple temperature gauges, automatic feeders, remote control, and even Wi-Fi enabled! However, think about what you really need before getting “Wowed” by all the fancy features out there.

8. Fuel

When buying smoker grills, you will need to consider the fuel you want to use. I have already explained to you the different types of smoker grills in the market today. If you want authentic smoky flavors, charcoal smoker is the best. But if you want something easy and still offer you the heavenly flavor of smoking then pellet smokers, gas smokers, and electric smokers are your best bet.

The Top 5 Best Smoker Grill 2019

*Below, you'll find our more detailed reviews, but you can also click the links above to see current prices or read customer reviews on Amazon.

 #1: Z Grills Wood Pellet Grill and Smoker

Z Grills Wood Pellet Grill and Smoker

Via Amazon.com

  • Quality
  • Price
  • Our rating

The Z Grills Wood Pellet Grill and Smoker is an 8-in-1 smoker grill that should accommodate any cooking techniques you want— be it braising, searing, char-grilling, roasting, baking, smoking, grilling, and barbecue. Made from stainless steel, this smoker is highly resistant to corrosion and boasts a polished and sleek finish. Plus, it comes with an extra wide grilling space so you can throw all your meats in one go.

It eliminates the need for a rotisserie thanks to its fan-forced convection cooking, so you can grill, bake, braise and roast to your heart’s content. The unit features an upgraded temperature setting allowing you to set cooking temperatures from 180°F – 475°F as well as an upgraded pellet feed control system which about ignites the smoker grill.

Featuring an automated electric feed system, this smoker will maintain the heat for you and produce an optimal amount of smoke so you can go and have fun while it cooks. The smoker also comes with useful features such as LED temperature readout, Digital Auto Temperature Control, and Electronic AUTO-start Ignition, making things easier for you. The upgraded cart with locking caster wheels makes the unit easy to move and the Special Waste Oil Collector assist in easy and safe cleanup.

What We Like

  • 8-in-1 smoker grill
  • Stainless steel construction
  • Wide grilling space
  • Adjustable temperature setting
  • Auto-start ignition
  • LED temperature readout

What We Don't Like

  • Very heavy
  • Inconsistent temperature

#2: Char-Griller Gas and Charcoal Grill

Char-Griller Gas and Charcoal Grill

Via Amazon.com

  • Quality
  • Price
  • Our rating

Every grill lover’s dream fulfilled— enjoy quick gas grilling on weekdays and slow charcoal cooking on the weekends with the Char-Griller Duo Gas and Charcoal Grill. Offering 1,260 square inches of smoking and BBQ grilling space, this smoker grill comes with heavy steel construction for durability and sturdiness.

Charcoal for flavor, gas for convenience, it comes with warming racks and a cast side burner for extra cooking capacity. Featuring porcelain-coated cast-iron grates, it provides an easy to clean surface and superior heat retention. The grille comes with electronic ignition so you can start grilling with just a push of a button.

Also, it has an adjustable charcoal grate height that provides precise heat control for a hot or low and slow sear. This grate also doubles as a quick dump ash pan for a mess-free cleanup. Its double bottom construction insulates and improves efficiency when you are cooking with charcoal. An include grate lifter also make your life a bit easier when adding new charcoal. Lastly, the smoker boasts plenty of storage with condiment basket and underneath shelf as well as movability with the added wheels.

What We Like

  • Gas and Charcoal Griller in one
  • Easy to clean cast-iron grates
  • Heavy steel construction
  • Plenty of storage
  • Good double bottom construction
  • Wheels for maneuverability

What We Don't Like

  • Prone to rusting
  • Warranty does not cover rust

#3: Traeger Lil Tex Elite Smoker Grill

Traeger Lil Tex Elite Smoker Grill

Via Amazon.com

  • Quality
  • Price
  • Our rating

Craft awesome wood-fired creations with the Lil Tex Elite Smoker Grill from Traeger. From smoked ribs to grilled steak and even baked apple pie, its set-and-forget design allows even the busiest chefs to cook with ease.

Featuring an aesthetic appeal of Victorian Steampunk vibe, the Lil Tex will surely be the center stage of your backyard cookout. And although named “Lil Tex”, do not belittle this beast with an offering of 418 square inches of grilling area— comfortably fit up to 5 racks of ribs, 24 hotdogs, 4 whole chicken or 16 burgers in one go!

Never use charcoal or gas ever again, this one is a pellet smoker, so your food will get infused with that wood-fired flavor that you love. Low and slow or hot and fast, this smoker grill offers 6-in-1 versatility to braise, roast, bake, smoke, grill, and BBQ food to juicy and yummy perfection. And you do not need to deal with fire starters anymore, with a simple flip, this smoker grill is hot and ready to go! Its porcelain grill grates feature non-stick surface for easy cleaning.

What We Like

  • Wide grilling area
  • Vintage aesthetic appeal
  • Non-stick grill grates for easy cleaning
  • 6-in-1 function

What We Don't Like

  • Cleaning can be a pain

#4: Camp Chef Woodwind Classic Pellet Grill

Camp Chef Woodwind Classic Pellet Grill

Via Amazon.com

  • Quality
  • Price
  • Our rating

Is budget an issue? Then consider this Woodwind Classic Pellet Grill from Camp Chef. This smoker serves the budget purpose and is large enough for big-sized BBQ parties with 570 square inches of grilling space. Truly worth every penny!

This smoker comes with a sear box and a broad range of temperatures choices from 160°F - 500°F as well as a 900°F for the sear box. Featuring Smart Smoke Technology, temperature control, and automatic auger fee pellet to the grill in order to maintain the heat and produce an optimal amount of smoke.

Braise, roast, bake, smoke, grill, and barbecue all you want with a touch of wood-fired flavor on every grill. When you’re done, its Patented Ash Cleanout makes cleaning so easy all you need to do is to pull a lever.

What We Like

  • Affordable
  • Smart Smoke Technology
  • Versatile
  • Patented Ash Cleanout
  • Includes a sear box

What We Don't Like

  • Inconsistent temperature
  • No refunds for faulty units

#5: Rec Tec Grills RT-700 Bull Portable Wood Pellet Grill

Rec Tec Grills RT-700 Bull Portable Wood Pellet Grill

Via Amazon.com

  • Quality
  • Price
  • Our rating

You can do some great grilling with this bad boy, but where it really shines it its smoking ability! The best just got better when REC TEC introduces the “Bull”, forever changing your grilling game! The Bull provides the same quality components and precision craftsmanship that Rec Tec fans have grown accustomed to but with several innovative features and upgraded offering that will blow your mind!

Featuring a cooking chamber made of stainless steel, you do not need to worry about peeling or cracking. For the geeky cooks, the included Wi-Pellet Wi-Fi technology will surely catch their attention. This feature allows you to fully control your cooking from anywhere using the Rec Tec Grills App which is available in both Google Play Store and App Store.

Not only that, but this smoker also boasts dual meat-probes which can be plugged directly into the controller of the grill, so you will no longer need a cooking thermometer for monitoring. With the Temperature Controls Smart Grill Technology, the bull maintains the temperature precisely and with the Automatic Lighting feature, you will not need any unsafe fire starters to start grilling. Lastly, this smoker can also shut down automatically and enters in a cool down mode with just a push of a button.

What We Like

  • Wi-Pellet Wi-Fi Technology
  • Dual meat probes
  • Temperature Controls Smart Grill Tech
  • Automatic Lighting
  • Automatic shutdown
  • Cool down mode

What We Don't Like

  • Limited mobility due to size
  • Very expensive

King of the Smoky Grills

And now we have a new royalty in town…

I present to you the king of smoky grills…

The Char-Griller Gas and Charcoal Grill!

Although we have some pretty competitive models, nothing will beat a genuine charcoal smoked meat. And if you ran out of charcoal or maybe in a hurry, you can quickly grill up something with gas grilling.

But if you want something easy, then I suggest you go with Rec Tec Grills RT-700 Bull Portable Wood Pellet Grill. Its innovative and techy features will certainly provide you with all the convenience you need.

Smoky Thoughts

Producing nutritional, great-tasting and tender-juicy meat has never been this easy. The smoker grill might sound like a façade to most people, but this baby is a blessing and a beast all in one, satisfying all your grilling and roasting and barbecue needs!

Are you curious about something? Maybe itching to share some knowledge? Feel free to voice it up and hit the comment section below.

Until then, happy smoky grilling!

The post Best Smoker Grill Reviews 2019: Top 5+ Recommended appeared first on Cooky Mom.

Thứ Năm, 17 tháng 1, 2019

Missing a Drop of Peanut Oil? Here are 9 Worthy Peanut Oil Substitutes!

For flavoring food and frying, peanut oil is a favorite of mine!

It is such a healthy and popular choice since it does not have the type of fats that can be detrimental to the heart. Its mild flavor and high smoke point make it a great choice for deep frying as well as grilling and roasting! Plus, it tastes really amazing, drizzled on salads, too!

So, if you are like me, who use peanut oil every now and then, it is inevitable that you can run out of this precious oil. Maybe you have guests allergic to peanuts? Does that mean that you’ll just rip that recipe page requiring it and forget about the whole thing?

Don’t you even dare!

If you ever ran out or cannot use peanut oil for specific reasons, you’ll be glad to know that there are other oils out there, worthy to be a peanut oil substitute!

First things first…

What is a Peanut Oil?

This flavorful and sweet oil comes from low-growing plants known as Arachis hypogaea. And even though it has the word “nut” in its name, peanut is actually a legume such as lentils and is therefore grown underground unlike real nuts such as almonds and walnuts that are grown on trees.

The peanut’s origin can be traced to South America. Incans of Peru was one of the first civilizations to use it and placed peanuts alongside mummies.

Peanut oil is extracted by processing and pressing peanuts and its kernels. However, kernels usually contain most of the oil, so they undergo a different extraction process.

Peanut oil is so flavorful and naturally sweet, giving a fragrant and sweetened life to dishes. This oil can be cold pressed, showcasing a yellow color with nutty and sweet flavor, or refined that is characterized by a neutral taste and light yellow color.

9 Best Peanut Oil Substitute

1. Soybean Oil

If you are aiming for a neutral tasting oil, the soybean oil is the best! A popular oil extracted from soybean seeds, soybean oil has a faint dark yellow or faint green color. Comparing this vegetable oil to other, soybean oil is healthier since it has fatty acids such as oleic acid, omega 3 and stearic acid.

Similar to peanut oil, soybean oil also has the smoke point of 450°F, making it ideal for baking, deep frying, or sautéing. When substituting for soybean oil, you can use the equal amount required in the recipe.

2. Canola Oil

If you are searching for a peanut oil substitute in baking, then canola oil will do the trick. This oil comes with a light flavor that should not overpower your baked products. Because of its medium to high smoke point at 400°F, canola oil is also great for sautéing. Not only that, but you can also use it for salad dressing, greasing pans and grilling.

This versatile oil is also considered healthy with high levels of monounsaturated fats, similar to olive oil, at 63 percent. In comparison to other vegetable oils, canola oil has the lowest amount of ALA or alpha-linolenic acid and saturated fats.

3. Avocado Oil

Boasting a high amount of monounsaturated fats, avocado oil makes a great substitute for peanut oil. And with such a high smoke point of 520°F, avocado oil is the best peanut oil alternative for deep frying and other cooking methods.

This oil is rich in oleic acid that helps lower bad cholesterol and decreasing your risk of heart disease and stroke.

4. Corn Oil

If you want a peanut oil alternative for all-purpose cooking, then you can have corn oil. One of the most affordable types of oil, corn oil is extracted from corn seed and is widely available in most supermarkets.

Similar to peanut oil, refined oil comes at a high smoking point which makes it great for baking, deep frying, and all-around cooking.

Or you can choose unrefined corn oil that has a lower smoke point, suitable for light cooking and making sauces. Moreover, using unrefined corn oil gives your dish a nutty flavor with a faint taste of corn.

5. Grapeseed Oil

In terms of stir-frying and sautéing, grapeseed oil can be used due to its medium to high smoke point of 392°F. And because it is virtually flavorless, grapeseed oil can also be used in baking without overpowering the flavor of your baked goods. You can also use it for marinating meat and salad dressings, too!

Just like peanut oil, grapeseed oil is also healthy. Loaded with omega 6, this light green colored oil helps increase energy and burn fat. It also comes with the right amount of vitamin E that can effectively boost immunity. However, even though this oil is low in saturated fats, its high amount of omega 6 can cause inflammation, so you might want to balance out with other forms of healthy fats.

6. Sunflower Oil

Another all-around cooking peanut oil substitute, both semi-refined and refined sunflower oil have the same high smoke point of 450°F. Featuring a subtle flavor, sunflower oil makes a great addition when baking or greasing your baking pans.

Sunflower oil is not your ordinary oil. It is a blend of monounsaturated fats and polyunsaturated fats that are good for the body.

7. Safflower Oil

Next to avocado oil, safflower oil boasts the second highest smoke point at 510°F, making it highly suitable for high heat cooking, particularly deep frying. Also, it has a neutral flavor, making it suitable for other cooking methods such as searing, sautéing, and stir-frying as well as making cookies, cakes, and pancakes.

With safflower oil, you can find 2 variants— high oleic and high linoleic. If you are making unheated recipes such as vinaigrettes, then choose high-linoleic safflower oil. But, if you are looking for a great alternative for peanut oil for high heat cooking, then high-oleic safflower oil is most recommended.

8. Almond Oil

Almond oil is not cheap substitute, however, its health benefits are totally worth it!

Almond oil comes in 2 types: refined and cold-pressed. The former is great for deep frying since it handles really high temperatures. The latter, on the other hand, is best for oil-based sauces, drizzling and other cold applications such as salads and chilled dishes.

Its health benefits are amazing— it is loaded with polyunsaturated fats and monounsaturated fats that help in maintaining good levels of cholesterol as well as vitamin E and omega-3 fatty acids for heart health. It is also great for the skin and is used for centuries in order to promote stronger nails and smoothens skin.

9. Walnut Oil

Another great alternative for peanut oil, walnut oil is excellent for finishing methods such as drizzling and salad dressings.  However, walnut oil is not recommended for deep frying or any cooking methods that require high temperatures. It is not cheap and if not used properly, it can leave a bitter taste in your dishes.

Walnut oil is loaded with essential fatty acids and antioxidants that help slow down the aging process as well as preventing heart diseases.

Oily Thoughts

And there you have it!

As you can see, there are plenty of other options that are just as great as peanut oil. So, do not worry if you can’t squeeze a drop or cannot use it because of allergies. The peanut oil alternatives above will complete your recipe without a problem!

Do you have any questions? Or maybe you are using other peanut oil substitute not mentioned above? Hope you can do us a favor and share your secret. Just fire up the comment section below.

Until then, happy cooking!

The post Missing a Drop of Peanut Oil? Here are 9 Worthy Peanut Oil Substitutes! appeared first on Cooky Mom.

Thứ Ba, 15 tháng 1, 2019

Best Potato Ricer Reviews 2019: Top 5+ Recommended

I don’t know about you, but I’m a bit obsessed with mashed potatoes.

This dish— it seems unappealing, unappetizing on a plate, but somehow, a spoonful on that creamy, smooth mash always end up being my favorite part of my meal.

And if I got some time to squeeze on my day, I’d love getting my hands on that mashed potato and flour and creating a homemade gnocchi, too! Those regular dense potatoes turned into something tender, little pillowy dumplings would complete my day anytime!

But, if you are constantly greeted with a gummy, lumpy, overly mashed pile of spuds or can’t re-create the pillowy texture of Italian restaurant gnocchi, then I’ll let you in on a little secret:

If you ditch the food processor, stand mixer, or hand masher, and use the best potato ricer instead, you are almost guaranteed to get those perfect mashed potatoes you search for, every time!

Potato what?

No. Images Products Where to buy?

1

Bellemain Stainless Steel Potato Ricer

2

Oxo Good Grips Potato Ricer

3

Norpro Commercial Potato Ricer

4

Chef ‘n FreshForce Potato Ricer

5

Tundras Potato Ricer

What is a Potato Ricer?

A potato ricer is a kitchen tool used to process potatoes or other foods by forcing it through a sheet of small holes that are usually about a diameter of grain rice.

Usually resembling a garlic press, potato ricers come with two long handles, one with a flat surface which sits into the basket, the other with a perforated basket at the end.

The food is placed in the basket, then the flat surface is pushed down by pressing the handles together which forces the food through the holes.

Potato Ricer VS. Potato Masher

A lot of people tend to mix up potato ricers and potato mashers. So, let me clear that confusion.

Being an extrusion tool, potato ricers force cooked potato through tiny holes and delivers rice-like pieces of potato, thus its name. A potato masher, on the other hand, is a tool you use to push down on potatoes and create a mashed texture.

You see, potato ricers are much better than mashers.

Ricers break potatoes into the smallest pieces possible without even disturbing the starch molecules, producing airy and fluffy mashed potatoes. Whereas, mashers often leave lumps and is also quite exhausting to use.

Do I really Need a Potato Ricer?

Good question!

Although some people might argue that you can have your mashing needs with a food mill or a masher, a potato ricer brings you some benefits that just are not there when choosing other mashing tools.

Like I’ve said before, potato ricers produce fluffy, smooth and lump-free potatoes every time! You also do not need to peel the potatoes before mashing them since the peels will remain in the hopper of the ricer when the clean mash is squeezed out. Moreover, potato ricers are crucial for home cooks who wish to create restaurant quality gnocchi.

And if you think that you do not need it that much since it only has one role, then you got it wrong. Potato ricer may be its name, but this kitchen tool is not limited to mashing potatoes. It can be used for several other culinary tasks such as creating homemade jam, applesauce, baby purees as well as squeezing liquid out of veggies such as spinach, cucumber, and spaetzle.

Potato ricers are simple to use, thanks to straightforward features. It is also non-electric and hand-held, which makes it easy to travel with whenever you go camping. Lastly, they are easy to clean and most models only require you to throw it to the dishwasher.

How to Use a Potato Ricer?

Here is a step by step process of using a potato ricer to create creamy and smooth mashed potatoes:

  • 1Wash the potatoes thoroughly. Cut them into smaller pieces about 1-inch cubed. Cook the sliced potatoes in boiling water for at least 15 minutes or until soft enough to break up when pressed with a fork. Drain the potatoes.
  • 2Fill the basket of the potato ricer with a few pieces. Make sure not to overfill the basket or the potatoes might ooze out to the sides. In case your potato ricer comes with a choice of discs, use the one with the largest holes.
  • 3Hold the potato ricer over a bowl or an empty pot and squeeze the handles together until the potatoes begin to extrude through the holes. Refill and press again, working quickly before the potatoes get cold.
  • 4After mashing, add your desired ingredients such as nutmeg, pepper, salt, warm milk, sour cream, or butter. Stir with a spoon to combine.

Using the Potato Ricer for Other Foods

As I have said before, potatoes are not the only food you can use on a ricer. Here’s how you can use a potato ricer on other foods.

  • Make a spaetzle with the potato ricer by pressing the dough into boiling water, forming the noodles.
  • Steam foods such as broccoli, peas, or apples until very soft. Add it into the ricer and press into a puree for baby food.
  • Cook fresh berries or thaw frozen berries in a saucepan with a bit of sugar until soft. Press the berries through the ricer into a bowl in order to make a fruit sauce or coulis.

Buying a Potato Ricer: A Professional Buying Guide

Now that you are convinced that you really need a potato ricer in your kitchen arsenal, you might be wondering how to choose the best one out there. Well, here is a detailed guide to help you choose the right one for you!

So, what do you need to look for?

1. The Material Used

Take note the potato ricers are usually made of plastic or stainless steel. Usually, however, the most preferred is one made of stainless steel. Plastics are commonly less durable and much prone to damage while stainless steel can last longer, enduring more abuse.

Some ricers come with the addition of ergonomic grips or rubber grips that can be quite helpful for pureeing larger amounts of veggies and fruits.

2. Size and Number of Holes

No one expects you to turn the potato ricer upside down and start counting how much holes which might confuse the sale associates. But, what you can do is to assess the density of the holes and the width. The more hole that the potato ricer has, then the better chances of it delivering a more consistent and smoother texture. If the holes are just too big, then you might end up with lumps like those that can be produced with a potato masher.

3. Quality and Durability

Even though made in stainless steel, there are some potato ricers that comes in poor build quality, particularly if they are not well connected to the bolts and screws. Being loosely connected can make them prone to falling apart, or of connected to firmly, it makes them harder to operate since they can lack flexibility.

Also, look for a potato ricer that can take a lot of abuse that can mash several potatoes at once or puree harder food items.

4. Ease of Use

Potato ricers are pretty much straightforward to use. However, there can be some models that make it difficult to use. The best potato ricers come fully equipped with a non-slip knob that is opposite to the handle so that you can rest on the bowl and have more leverage when operating it.

5. Components to Look

One component that you need to always look carefully when buying the best potato ricer is its mill features or much commonly known as the hopper. This is the part where you need to put the potato before you press it through the holes. The hopper needs to be large enough in order to fit a potato— either cut into smaller pieces or as a whole.

Moreover, you also need to consider its press apparatus to be sturdy and functional. Lastly, the handle of the best potato ricer needs to be easy to hold and grip. Consider those with a rubberized coating in order to avoid slipping when using. Ergonomic handles can also make the job of grating and mashing a potato easy even for children who naturally have weaker hands.

6. Versatility

Even though you can easily put a whole apple in almost any potato ricer out there, what happens if you wish for a different texture than a gnocchi-ready puree? Do you prefer going out there and buying another ricer for such an occasion? Or look for one that comes with interchangeable discs of different sizes and numbers of the holes? I bet you prefer the latter.

7. Price

Well, obviously, you should not spare on the money if you want to buy good-quality kitchen products. That is, unless if you want to come back to your kitchen store and buy new ones every few months.

But, always remember that a higher price does not always mean higher quality. If you consider all the factors mentioned above, then you should be able to make the right purchase and consider only the price as the last criteria to finalize your decision.

The Top 5 Best Potato Ricer 2019

*Below, you'll find our more detailed reviews, but you can also click the links above to see current prices or read customer reviews on Amazon.

No. Images Products Where to buy?

1

Bellemain Stainless Steel Potato Ricer

2

Oxo Good Grips Potato Ricer

3

Norpro Commercial Potato Ricer

4

Chef ‘n FreshForce Potato Ricer

5

Tundras Potato Ricer

#1: Bellemain​​​​ Stainless Steel Potato Ricer

Bellemain​​​​​ Stainless Steel Potato Ricer

Via Amazon.com

  • Quality
  • Price
  • Our rating

Create outstanding potato dishes with this amazing potato ricer from Bellemain! Made from high-quality, heavy-duty 18/10 polished stainless steel, the Bellamain potato ricer indicates a long-lasting design that should last for generations!

Easily create perfectly creamy, smooth and fluffy mashed potatoes with this instrument as the comfortably cushioned, form-fitting, bright red, long handles require you to use less of your hand strength. The ricer features a good sized basket to make at least 1.5 cups of mashed potatoes, baby food or cauliflower mash. Plus, the large non-slip red knob securely holds the ricer in place on a bowl or a pot.

Not only that, you can get really creative, thanks to Bellamain offering a complete set of 3 interchangeable ricing discs for different coarseness or fineness. It is also very easy to clean— you can either soak it in soapy water or throw it in the dishwasher! This is such an amazing kitchen gadget to buy, however, if you are not that satisfied, Bellamain offers a 100 percent refund guarantee, no questions asked! Oh, plus, it also comes with a 2-year warranty for a risk-free buying!

What We Like

  • Sturdy and heavy-duty
  • Good quality
  • Good price
  • Comfortable grip
  • Large knob
  • 1.5 cup capacity basket
  • Comes with 3 interchangeable discs
  • 2-year warranty
  • 100 percent refund guarantee
  • Dishwasher-safe

What We Don't Like

  • Discs can be hard to clean
  • Discs are hard to secure to the hopper chamber
  • Overfilling can cause the ricer to break 

#2: Oxo Good Grips Potato Ricer

Oxo Good Grips Potato Ricer

Via Amazon.com

  • Quality
  • Price
  • Our rating

Whether you want to create perfectly fluffy, light and smooth mashed potatoes or homemade pureed baby food or restaurant quality, pillowy gnocchi, the OXO Good Grip Potato Ricer can do it all!

Coming with a durable and sturdy stainless steel construction, this potato ricer can produce perfectly smooth texture every time, to the point that there you will not need to add milk and butter to the potatoes. Other than easily mashing potatoes, it also allows you to mash fruits and veggies such as apples, yams, cauliflower, carrots and more!

The potato ricer boasts soft and comfortable non-slip grips on its handles that conform to the shape of your hand and also absorb pressure as squeeze it together. It also features non-slip cushioned knob that securely hooks onto any type of bowl or pot. Cleaning is also a breeze— a few scrubs of soapy water and rinses it with running water and you’re done or you can just throw it to the dishwasher! Equipped with a hanging hole, you can hang it for easy and quick storage!

What We Like

  • Affordable price
  • Dishwasher-safe
  • Convenient hanging hole
  • Versatile
  • Soft and comfortable non-slip grip that absorbs pressure
  • Cushioned, non-slip knobs to hook onto any pot or bowl
  • Durable and sturdy stainless steel construction

What We Don't Like

  • It does not have a large capacity
  • Edges are quite sharp
  • It needs a strong grip

#3: Norpro Commercial Potato Ricer

Norpro Commercial Potato Ricer

Via Amazon.com

  • Quality
  • Price
  • Our rating

If you are obsessed with mashed potatoes or working in a restaurant, then the Norpro Potato Ricer is second to none when it comes to preparing lots of fluffy, light, soft a lump-free mashed potatoes.

For fast and easy mashing of large batches of potatoes, this potato ricer is constructed from commercial grade, high-quality stainless steel. Having a whopping capacity of 2.75 cups, you can create batches by batches of mashed potatoes in no time! Also, thanks to its unique design and shape, this potato ricer is definitely easier to press than most models. Its sturdy handle offers you good leverage, plus it fits nicely over most pans and pots for an easy potato “ricing” operation without the mess!

Not only for mashing potatoes, the Norpro Potato Ricer can also mash veggies like tomatoes, yams, cauliflower, and carrots, fruits like apples and even allow you to create baby foods. Cleaning is not that easy though thanks to its shape which creates lots of nooks and crannies and because it is not dishwasher-safe, some of its parts can be cleaned with soapy water.

What We Like

  • Fits over most bowls and pots for a no-mess operation
  • Sturdy, commercial grade stainless steel
  • Ideal for home use and restaurants
  • Affordable
  • Large capacity
  • Heavy-duty handles for good leverage

What We Don't Like

  • Not dishwasher safe
  • Stop lever is hard to press down
  • The handle can bend after a long term of use
  • The handle is not that comfortable
  • A bit pricey

#4: Chef ‘n FreshForce Potato Ricer

Chef ‘n FreshForce Potato Ricer

Via Amazon.com

  • Quality
  • Price
  • Our rating

Talk about fast and effortless operation, the FreshForce Potato Ricer from Chef’n is definitely a joy to use! The stainless steel ricer comes with a gear-powered mechanism that helps push down the potato through the hopper, thus requiring less strength from you and makes it easy for one-handed operation.

Its handle is constructed from heavy-duty plastic that is padded and super comfortable in order to minimize hand strain. Having a fair-sized hopper with small holes, you get fluffy and light mash potatoes every time. It also allows you to prepare other food such as gnocchi, potato croquettes, shepherd’s pie, and baby food.

Thanks to its simple, 2-construction design, you can remove the stainless steel basket and wash it with warm, soapy water or go directly into the dishwasher!

What We Like

  • Dishwasher-safe
  • Two-piece construction
  • Easy-to-squeeze plastic handles
  • Dual-gear mechanism that minimizes hand strain and increases pressing power
  • High quality
  • Multi-function

What We Don't Like

  • Bulky
  • The basket is hard to remove
  • A bit pricey

#5: Tundras Potato Ricer

Tundras Potato Ricer

Via Amazon.com

  • Quality
  • Price
  • Our rating

Making restaurant-quality mashed potatoes from the comfort of your own home has never been easier with the Tundras Potato Ricer. With this potato ricer, you can create top-quality dishes with absolute ease.

The potato ricer comes with 3 interchangeable discs which give you full control of your meals. You can choose from coarse, medium and fine sized grains for making baby food, mashed potatoes, mashed squash, gnocchi and more!

Featuring an easy grip handles, the ricer significantly reduces tension and stress on your wrists and hands so you can mash easily and quickly. Thanks to its stainless steel construction, the ricer is guaranteed to last long that can mash even the toughest of potatoes.

This kitchen tool is also easy to keep in great shape as it is easy to use. Because the discs can be removed, you do not have to worry about reaching into every nooks and cranny. Plus, the whole potato ricer is dishwasher safe

What We Like

  • Comes with 3 interchangeable discs
  • Easy to grip handles
  • Stainless steel construction
  • Easy to clean
  • Dishwasher safe

What We Don't Like

  • Flimsy frame
  • Grip of the handles are sharp

S-Mashing King

We simply can’t end the article without announcing the best of the best, can’t we?

So, now among the top 5 recommended potato ricers above, I’ll tell you my favorite. All hail the “S-Mashing King”…

Bellemain Stainless Steel Potato Ricer!

Reputable name, heavy-duty stainless steel, easy to operate, long handles, good capacity, comes with 3 interchangeable discs, dishwasher safe and offers risk-free buying— I mean what more will you ask?

Everything good points to this superb kitchen tool for you to create yummy, creamy, and fluffy mashed potatoes, every time!

Fluffy Thoughts

Whether you are making mash for your side dish or want some homemade gnocchi or creating tasty toppings for your Shepherd’s pie or even a healthy pureed food for your little one, a good potato ricer can help you achieve that quality mash that the whole family will surely love.

I hope you find this article helpful! If you have questions or maybe a tasty potato recipe, feel free to share it with the community and fire up the comment section below!

Until then, happy mashing!

The post Best Potato Ricer Reviews 2019: Top 5+ Recommended appeared first on Cooky Mom.

Thứ Bảy, 12 tháng 1, 2019

Re-Heating Tamales Like a Pro: Choose From These 5 Easy Methods

When talking about Mexican cuisine, people automatically think of the beany or beefy burrito and crunchy tacos.

I know, those are one of my favorites!

However, if you would ask me, there is one Mexican dish that I truly believe to be even better than those two— the traditional Tamale!

Huh?

And for those who are quite unfortunate not to know what this yummy dish is, grab a seat and drool from this culinary lesson!

What are Tamales?

What are Tamales?

Tamale is a classic dish that is derived from the Mesoamerican cuisine. Although there are several of variations on this dish, the usual recipe is made from dough that is steamed inside a banana leaf or corn husk, giving the dough a distinctive flavor and delicious banana or corn aroma.

Tamales Through Time and Cultures

Tamales originated thousands of years ago where the first reference to it was from 100AD Guatemala. Tamales were also used by the Mayas and Aztecs as a means of taking food with them on their long journeys.

Tamale gradually evolved over the years. In Mexico, the dough is filled with lard and sweet and savory chicken or pork fillings. Mexicans take their tamale seriously and making them is almost like a ritual to them. This savory dish also plays an essential role in some of Mexican fiestas and festivals.

In Spain, on the other hand, tamales are filled with tomato sauce which they like to call a “green corn tamale”. Meanwhile, in Tobago and Trinidad, their tamale is known as “pastille”, filled with raisins, meat fillings and other seasoning which is one of their popular Christmas food. And in Asia, tamales comes with seafood, meat or even coconut milk fillings!

Re-Heating Tamales Like a Pro: 5 Easy Methods to Choose From

So, as you can see, the tamale is a very well-traveled dish which crosses various cultures and very popular.

And today, I wish to help those of you who love snacking on tamale (me too, of course). Maybe because of your love for tamales, you cooked too much than you and your family can eat and have a bunch of leftovers.

Well, there is no question of what to do to them the next day— you just reheat them. I mean, there is nothing sadder than wasted tamales, right?

Heating tamales, however, is no easy task!

Why?

Well, if you are not careful, those precious, yummy tamales may end up starchy and dry, and unappetizing, and unappealing, and unsavory… (Should I continue?)

But, today is your lucky day! Being the tamale lover I am, I shall teach you how to re-heat those wonderful leftover tamales, so you can enjoy them the second time around!

Get your fiesta face and Mexican hats ready, ‘cause here are 5 best methods to reheat tamales like a pro!

1.  Steaming Hot!

If you want your tamale moist, then steaming them is the best way to go. Use this method if you have all the time to cook, but business calls and kids kept you busy to watch it heat.

  • Fill the steamer with water ¼ of the way. In case you do not have a steamer, you can use a pot with a steaming rack.
  • Set the heat of your stovetop or steamer to medium. Leave it for 10 minutes and allow the water to heat up.
  • Place your leftover tamales on top of the rack. Make sure that they are not submerged in the water.
  • Cover the steamer or pot and steam the tamales. If they are chilled, steam them for 15 – 20 minutes. If they are frozen, leave it alone for 20 – 30 minutes.

2. Your Oven is Your Best Bud

The almighty oven is probably the best way to heat your tamales perfectly. Although it may take a bit longer than the other methods, the wait is well worth it— evenly re-heating and bringing out the tamale’s heavenly flavor like newly cooked!

  • Preheat the oven at 425 degrees Fahrenheit.
  • Wrap each tamale in tin foil 3 – 4 times. Make sure to squeeze the bundles in order to remove any air inside.
  • Arrange the wrapped tamales on an oven-safe tray or dish.
  • Place it in inside the oven and cook for 10 minutes. After that, flip the tamales and cook for another 10 minutes in order to evenly heat the tamale.

3. Get the Crunch with a Pan

Using the pan and the stove will give you that desirable crisp and crunch in every bite!

  • Peel the husks of the tamale.
  • Add a teaspoon of olive oil into the pan and allow it to heat for 2 – 3 minutes on medium heat.
  • Carefully place the tamales in the pan. Cover the pan with a lid to heat faster.
  • Cook the tamales and make sure to flip them over every 2 – 3 minutes.
  • Continue this until the tamales are crispy with its outside completely browned.

4. Pull-Out the Deep Fryer

If you wish for the crispiest tamales, then the deep fryer is your option. However, know that it also comes with additional calories and fat, due to it being fully submerged in oil. You can try this method to give you the crunchiest tamales everand do not mind the extra calories that come with it.

  • First, defrost the tamales. Frozen tamales can cause the deep fryer oil to pop and bubble.
  • Pre-heat the deep fryer.
  • Peel the husks of the tamale and pat down the tamales with a paper towel. This should remove extra moisture that can cause the oil to bubble and pop.
  • Using tongs, slowly submerge the tamales.
  • Cook for 2 – 3 minutes. The tamales need to be golden brown.
  • Remove it from the oil and allow to cool.

5. Zap in the Microwave

If you feel a bit lazy and want some tamales without doing too much, then there is always the microwave. Re-heating tamales in the microwave are the quickest and easiest option, perfect when you have no time or just feeling sluggish.

  • Defrost the tamales.
  • Wet down a piece of paper towel and wrap it around the tamales. This should prevent the tamales from drying out.

Pro Tip: When heating tamales using the microwave, do not heat for more than 2 at a tie.

  • Place the tamale in the microwave and cook them for 15 seconds in high heat.
  • Once the time is up, pull out the tamale and unwrap the paper towel.
  • Wrap the tamale in another wet paper towel. Then, flip it over and put it back into the microwave. Cook it for another 15 seconds.
  • Once finished, pull out the tamale and remove the outer husk. Make sure that it has been heated evenly. If not, then you can re-wrap it again with a wet paper towel and cook for another 15 seconds.

Freezing and Saving Leftover Tamales

You put a lot of effort and made too much. Now, you have some leftovers. Or maybe you want to save a stash for tomorrow or this weekend. So, you will need to properly store and freeze those yummy tamales. How?

  • First, make sure that the tamales completely cooled down before you wrap them.
  • To freeze tamales, leave the tamales in the husks and wrap them tightly with a foil or plastic wrap. Place them in freezer bags or airtight food storage containers.

A properly packaged tamale can stay in your freezer for at least 6 months. However, if your tamales come with beef, pork, or chicken, then you might want to eat them, between 2 and 6 months later, but no later than that!

Final Thoughts

Tamales!

There is absolutely nothing like them— with their perfect combination of rich, spicy, savory fillings and delicate, slightly sweet banana or corn dough. They are a delicious treat wither in winter as hot comfort food or during summer with a cookout!

And whether you froze leftover homemade tamales or brought prepared frozen tamales, you got a variety of option in re-heating them and bringing back their deliciousness.

So, what are you waiting for? Take those tamales out of the fridge and get ready to hold a Mexican-themed snack party today!

Got any questions? Suggestions? Feel free to share your insights and fire up the comment section below!

Until then, have a lot of tamale fun!

See more

How to Reheat Chicken Wings

How To Reheat Roast Beef

How to Reheat Fried Chicken

The post Re-Heating Tamales Like a Pro: Choose From These 5 Easy Methods appeared first on Cooky Mom.